3. The Home dashboard
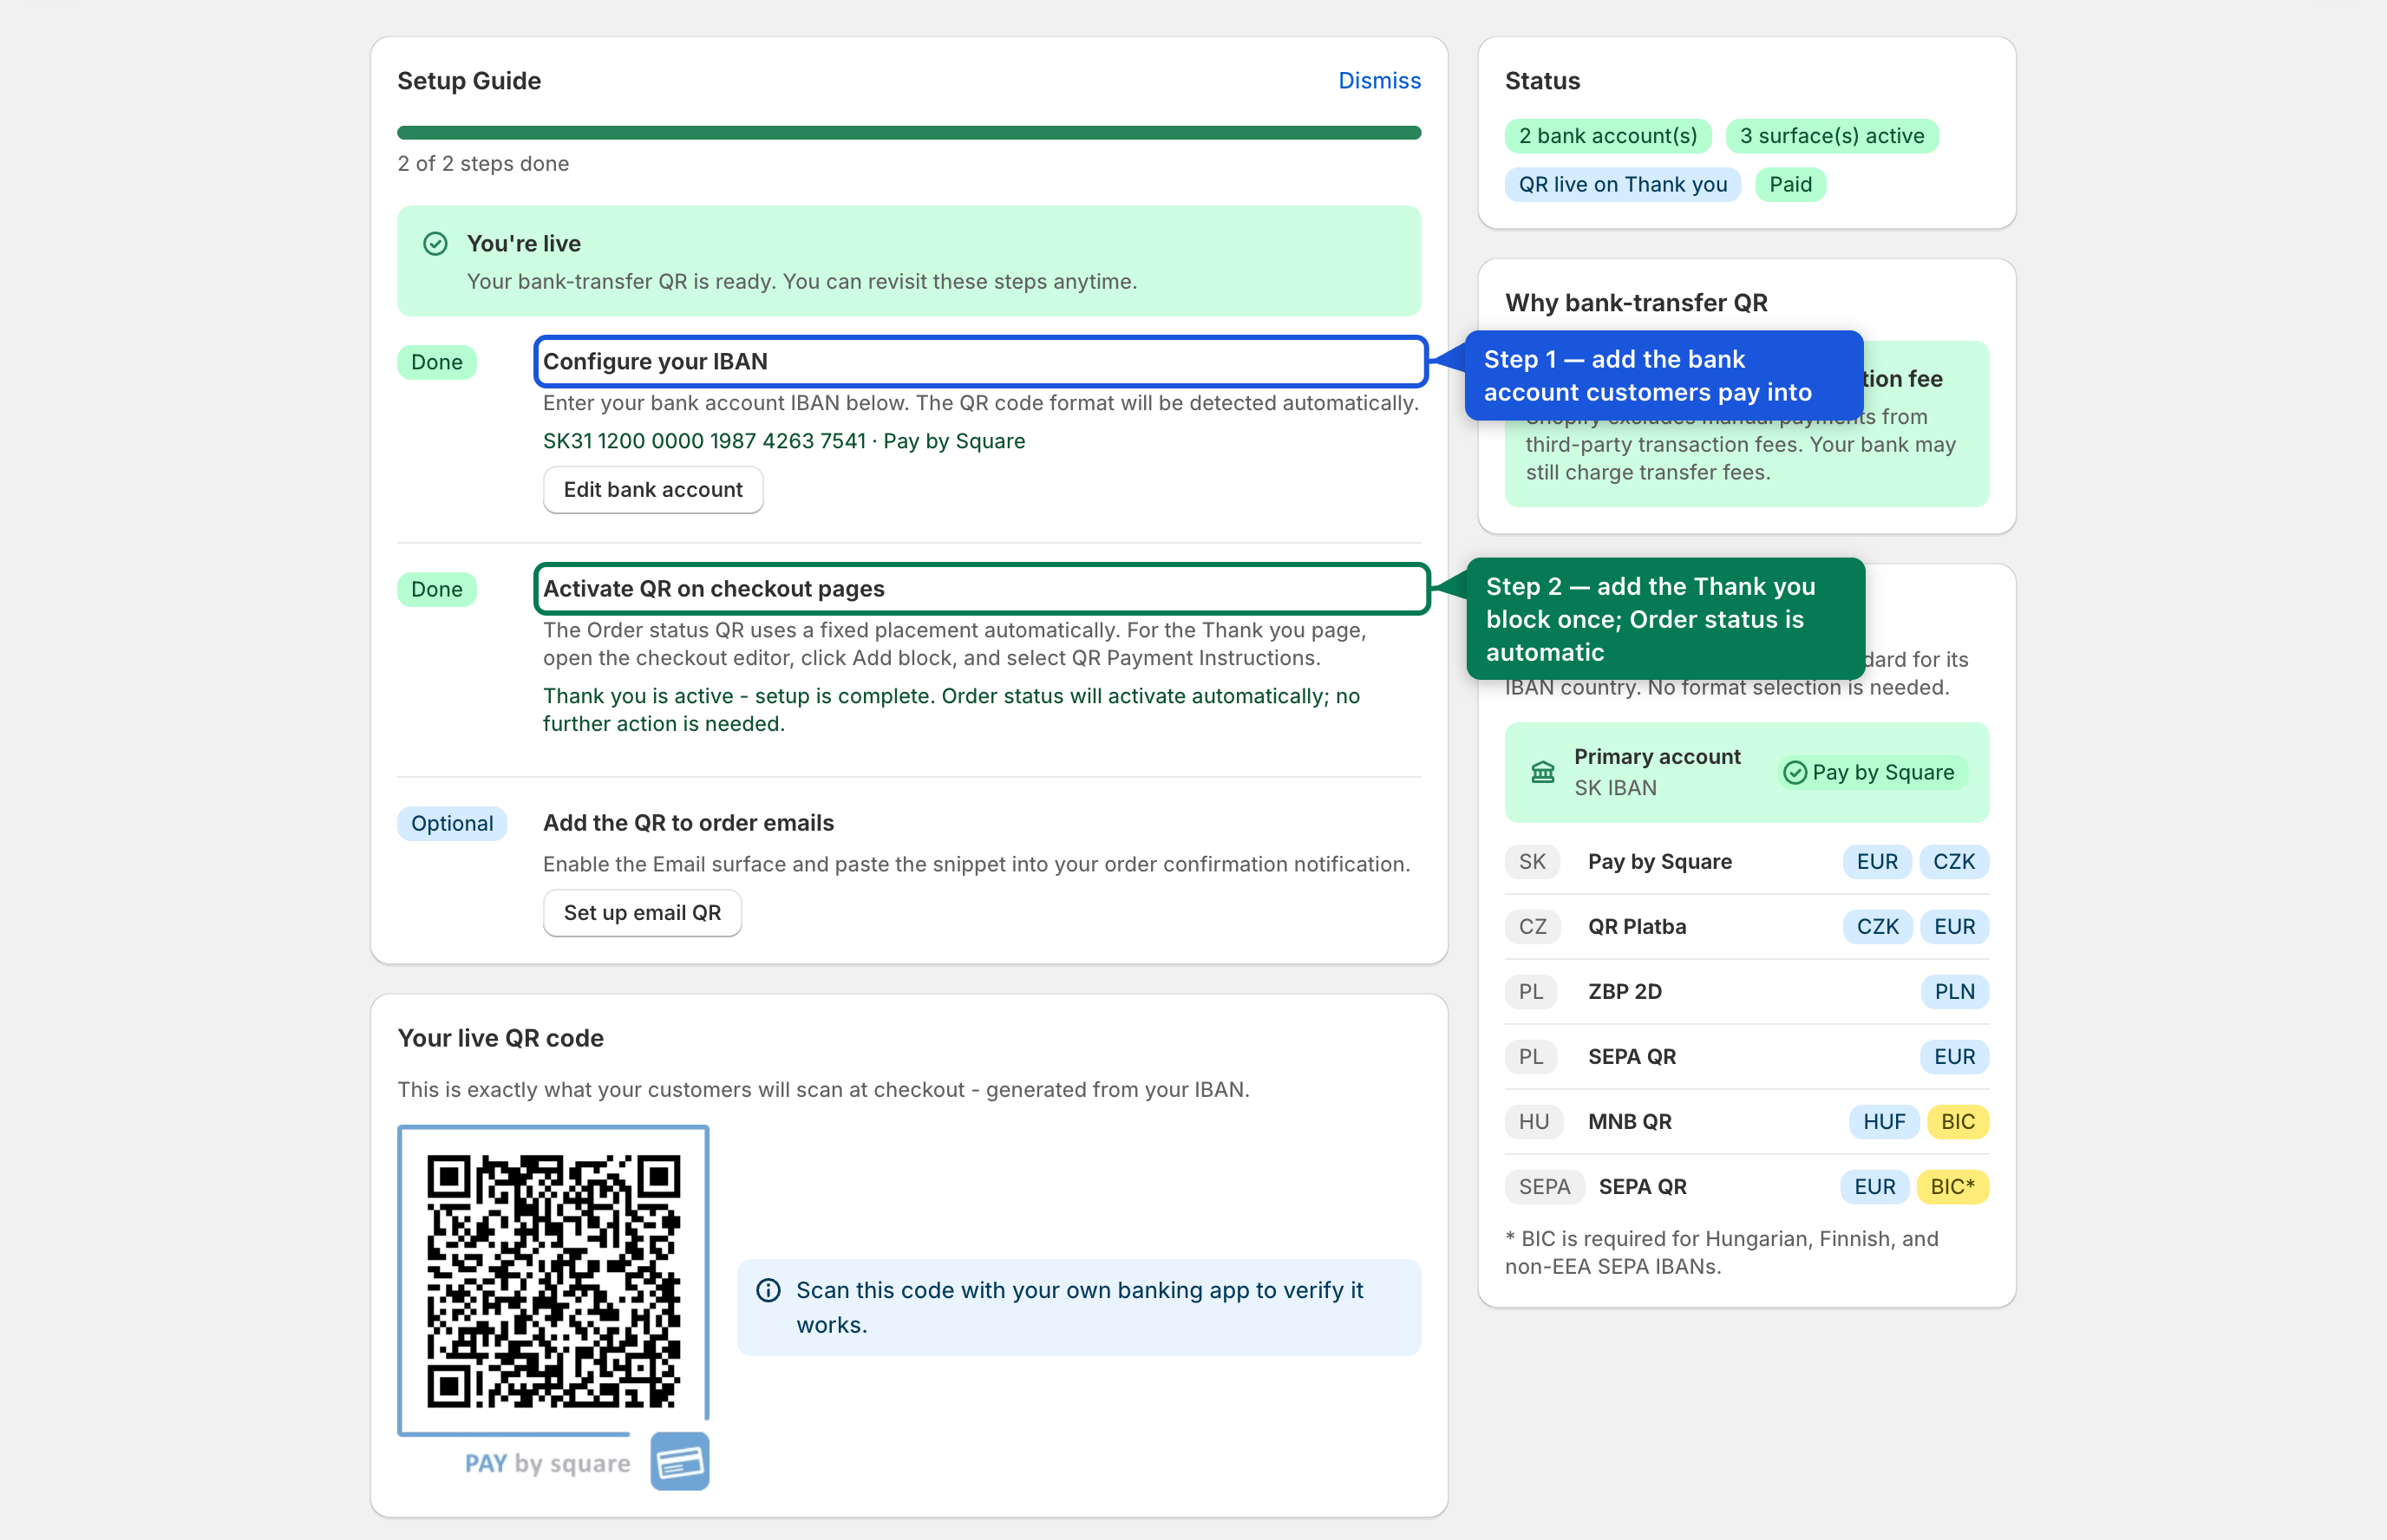
The Home page opens with a 2-step setup guide (a third, optional step covers email). Its progress bar and both core steps must be complete before the QR can reach a customer:
- Add a bank account. Links straight to Bank accounts. Once a valid IBAN is saved, this step shows the IBAN (grouped in 4-character blocks) and which national standard it maps to (e.g. Pay by Square).
- Activate the checkout block. The app checks — via Shopify's App Bridge — whether your Thank you page block and Order status placement are actually live, and reports one of four states: both live, only Thank you live, only Order status missing, or not live yet. If your Shopify plan/theme doesn't support that live check, a manual "I've added it" toggle appears instead — see 5.2.
- (Optional) Turn on email QR — not counted toward the 2-step progress, since it isn't required for the app to work.
You can dismiss the setup card once done; it collapses to a one-line progress summary with a "Show setup guide" link to bring it back.
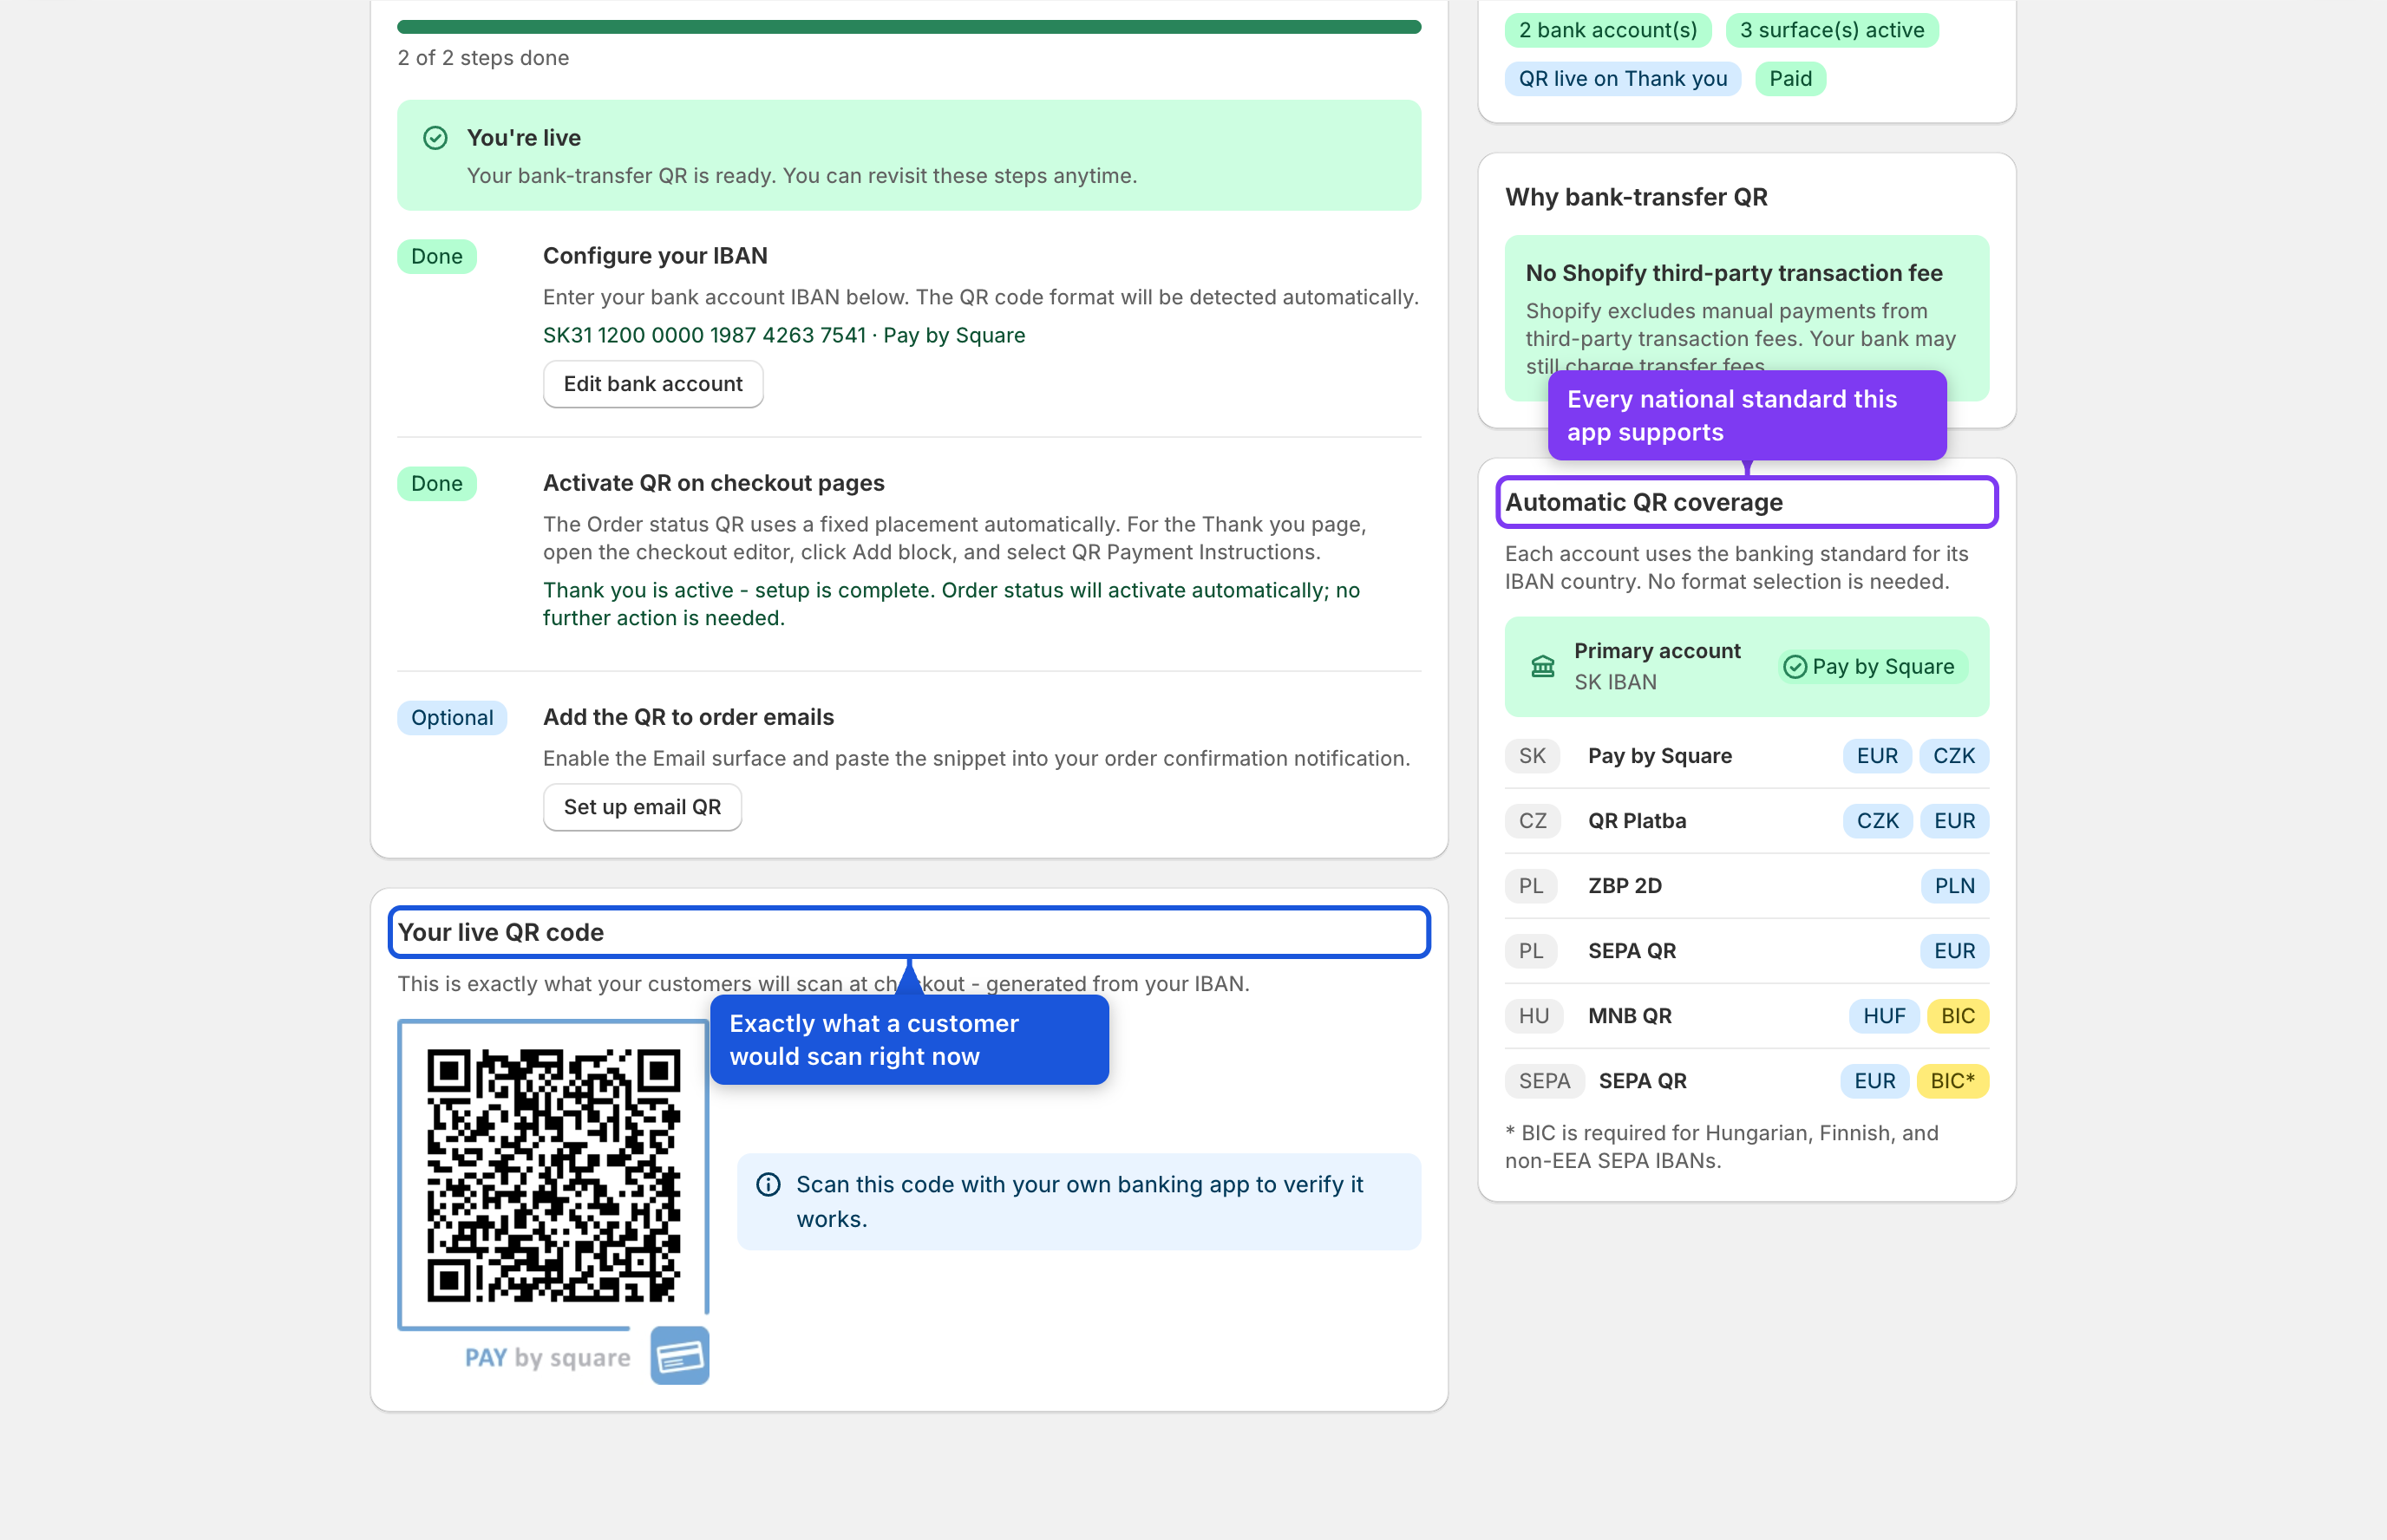
Once an IBAN is configured, Home also shows:
- A live QR preview — the exact code a customer would scan for a sample 99.90 order, in the currency your primary account actually supports. Scan it with your own banking app to confirm it works before going live.
- Status badges — number of bank accounts, number of active surfaces, live checkout-activation state, and your current plan.
- A free-plan usage banner once you're near the monthly 50-order cap, with a direct upgrade link.
- A format-coverage card listing all 5 national standards, their currencies, and which ones require a BIC.