5. Display & surfaces
Open Display & surfaces in the app navigation.
5.1 Where the QR can appear
| Surface | Toggle | Notes |
|---|---|---|
| Thank you page | On by default | Needs the checkout block added once — see 5.2. |
| Order status page | On by default | Placed automatically once the extension is live — no theme editing needed. |
| Order confirmation email | Off by default, Starter+ | Needs a one-time Liquid snippet paste — see 5.5. |
| Admin order page | Off by default, Pro+ | Shows the QR to you (or staff) on the order detail screen — see 5.6. |
5.2 Activating the checkout block
The Thank you page needs the block added once in the checkout editor: Settings → Checkout → Customize → Thank you page → Add app block → QR Payment Instructions. The Order status placement is automatic once the extension is active — there is nothing to add there manually.
Home's setup guide (Section 3) detects both automatically where Shopify's App Bridge extensions API is available; otherwise it offers a manual "I've added the block" toggle so you can still track your own progress.
5.3 Payment method conditions
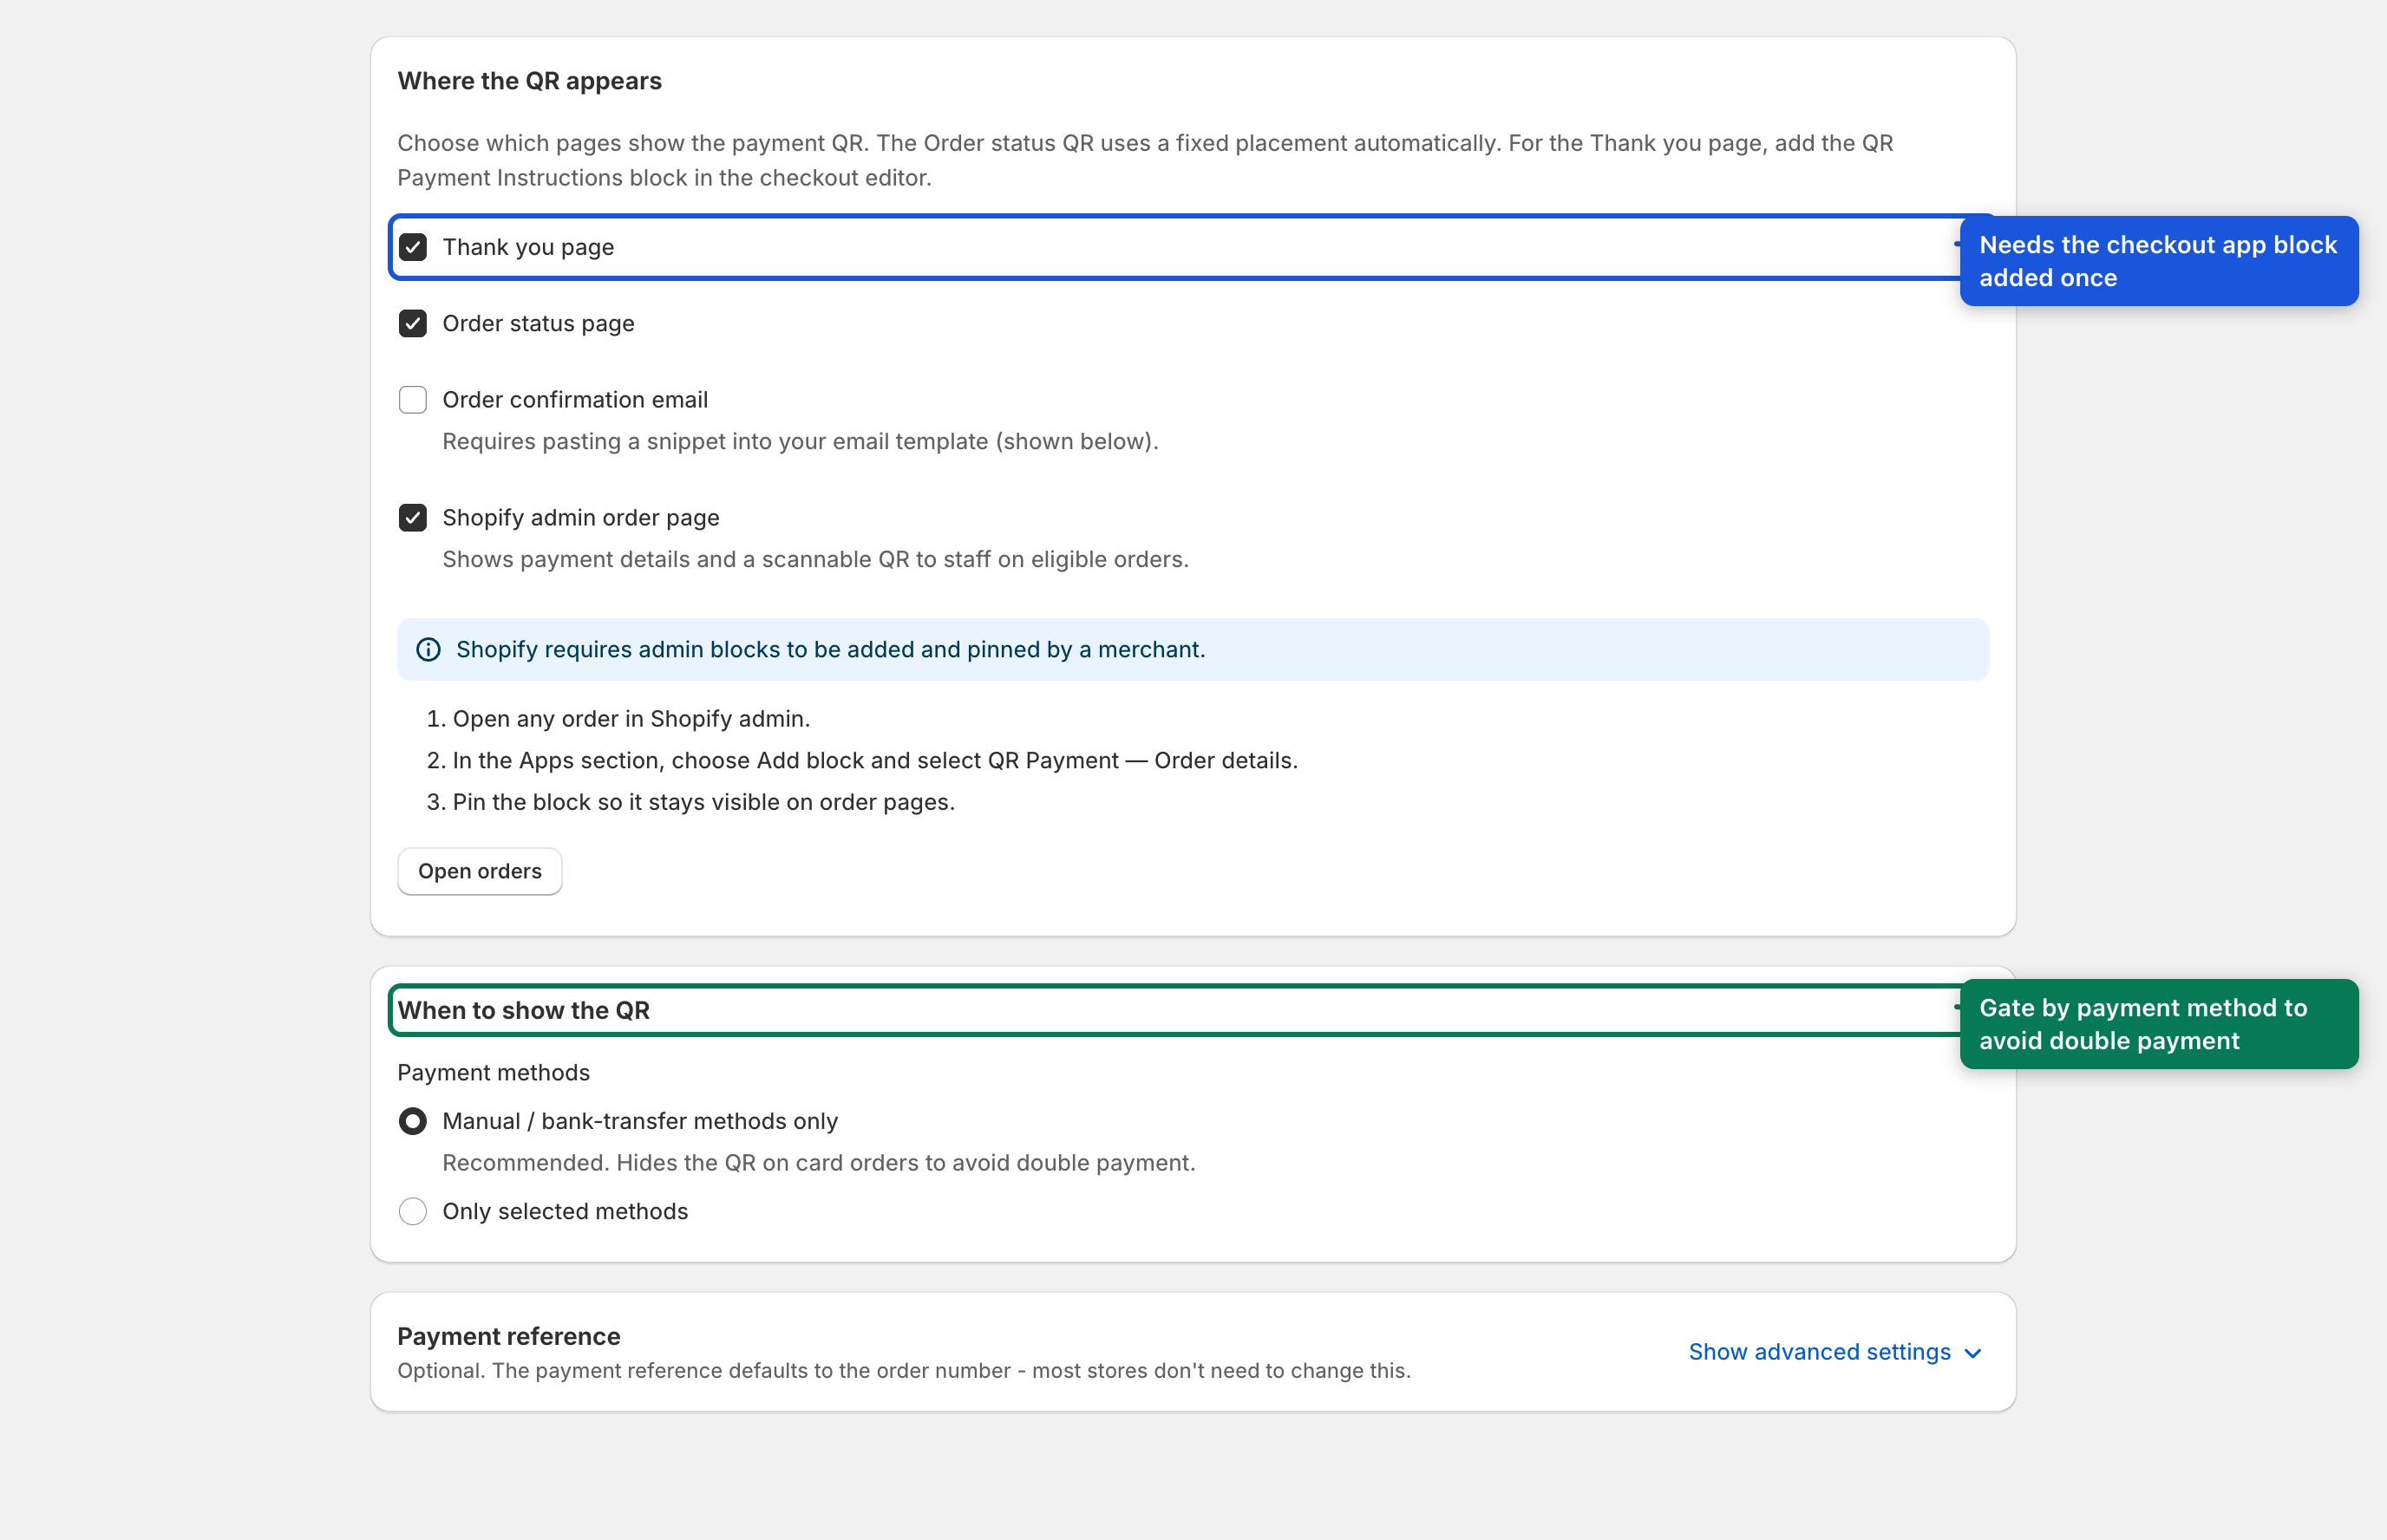
Under Conditions, choose when the QR should show:
- All manual payment methods (recommended) — the QR appears only for an order that: is currently in Shopify's Pending payment status (not Authorized, not Partially paid), has a genuine manual-payment-gateway transaction on it, and still has a positive outstanding balance. Cash on delivery is explicitly excluded even though it's a manual gateway, since it isn't paid by bank transfer. This avoids ever showing a transfer QR next to a card payment, an already-authorized card hold, or a partially paid order.
- Selected payment methods only — pick specific payment method names observed from your recent orders (each shown with its order count), still subject to the same Pending-status and positive-balance checks above. Requires at least one selection.
The QR is always hidden once Shopify marks the order paid or cancelled — this safety behavior is not configurable, since disabling it would risk a customer paying twice.
5.4 Payment reference (VS / KS / SS)
An optional, advanced section (collapsed unless already customized):
| Field | Purpose |
|---|---|
| Variable symbol prefix | Up to 4 digits prepended to the order number (the reference is capped at 10 digits total, so only the order number's trailing digits fill the remaining space). A short prefix leaves more of the order number intact and makes a collision between two different orders far less likely — but with a very high order number, or a long-running store, two orders whose trailing digits happen to match can still land on the same reference. Leave this at 0 digits unless you have a reason to prefix it. |
| Constant symbol (KS) | Up to 4 digits — used by SK/CZ bank formats. |
| Specific symbol (SS) | Up to 10 digits — used by SK/CZ bank formats. |
| Payment note / message | Free text shown as the payment note. Use {order_number} to insert the order number. |
Most stores never need to touch this — the reference defaults to the order number.
5.5 QR in order confirmation emails
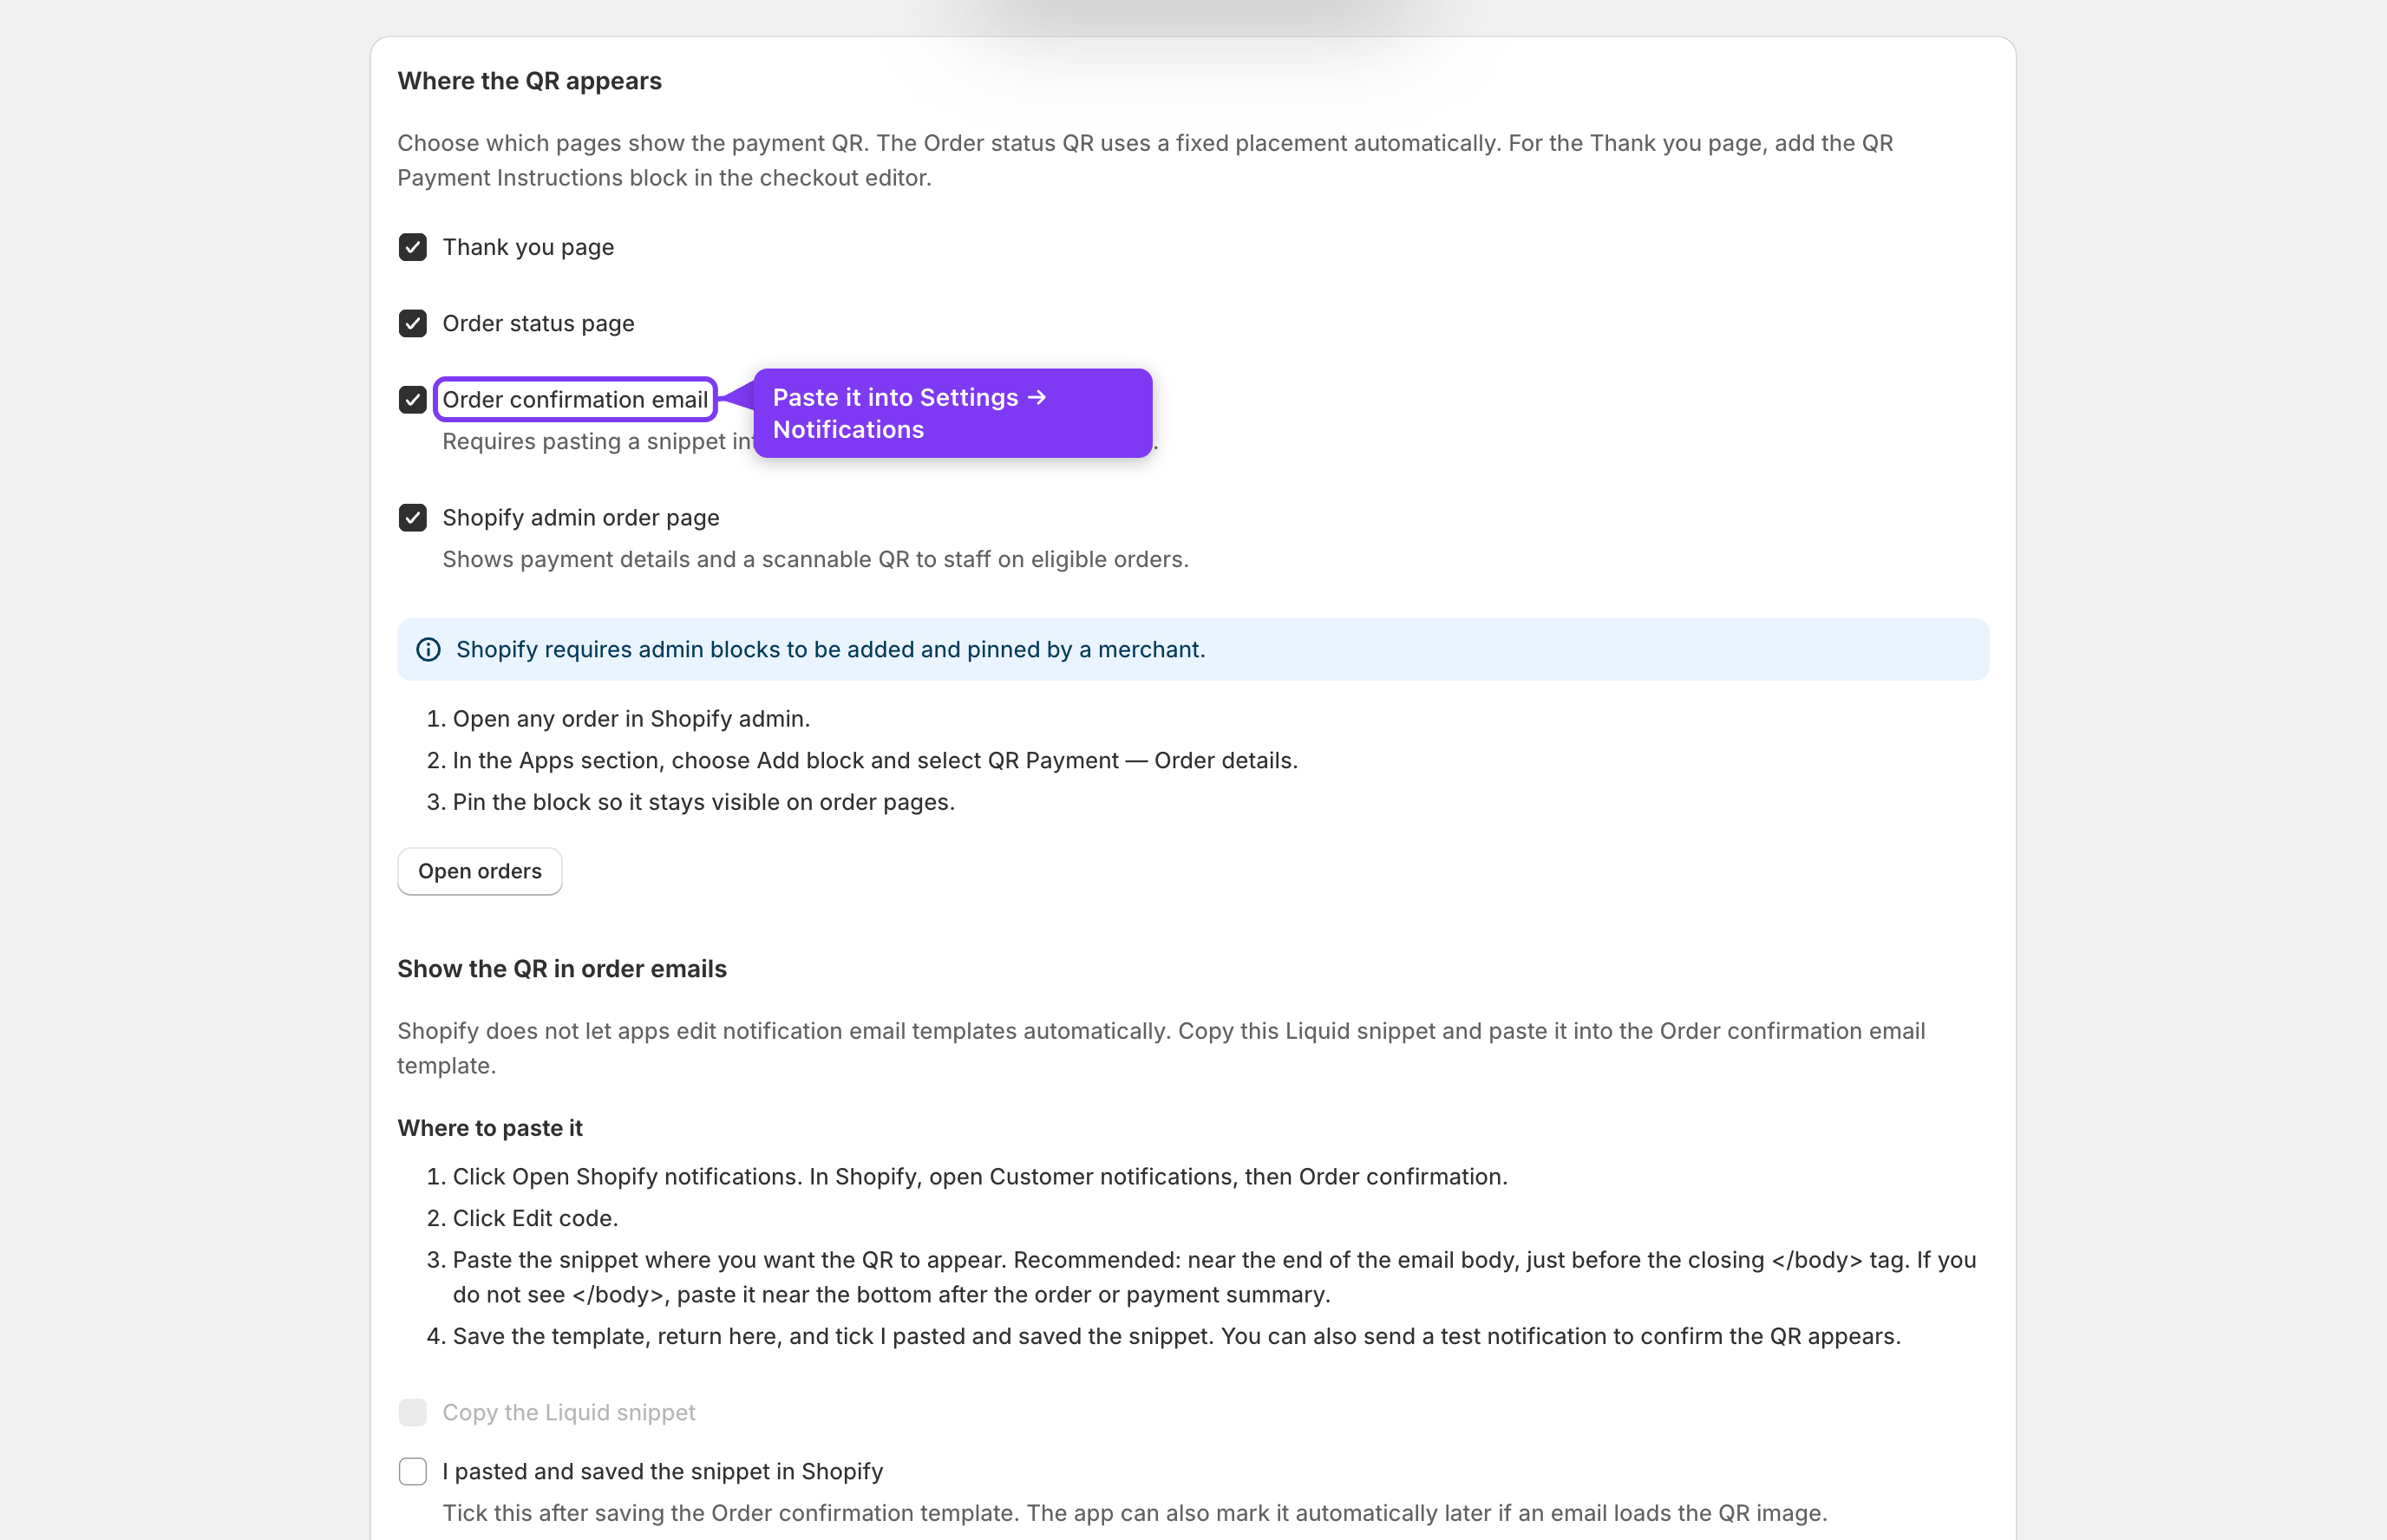
Shopify doesn't let apps edit notification templates directly, so once you enable QR in order confirmation emails (Starter+), the page shows the exact steps:
- Copy the provided
<img>Liquid snippet. - Go to Settings → Notifications → Order confirmation (a button opens this directly).
- Paste the snippet where you want the QR to appear in the email.
- Save the notification template.
Tick "I've pasted the snippet" once done — this is a progress checklist, not an automatic detection, since the app cannot read your notification template.
5.6 QR on the admin order page
Turning on QR on the admin order page (Pro+) does not place anything by itself — Shopify requires admin blocks to be added and pinned by a merchant, the same way a checkout app block works. After enabling the toggle, the page walks you through it:
- Open any order in Shopify admin.
- In the Apps section, choose Add block and select QR Payment — Order details.
- Pin the block so it stays visible on order pages going forward.
Once pinned, you (or staff) see the same QR the customer sees, directly on eligible orders — you only need to do this once; it then applies to every order.