2. Installation
Step 1 - Upload the module
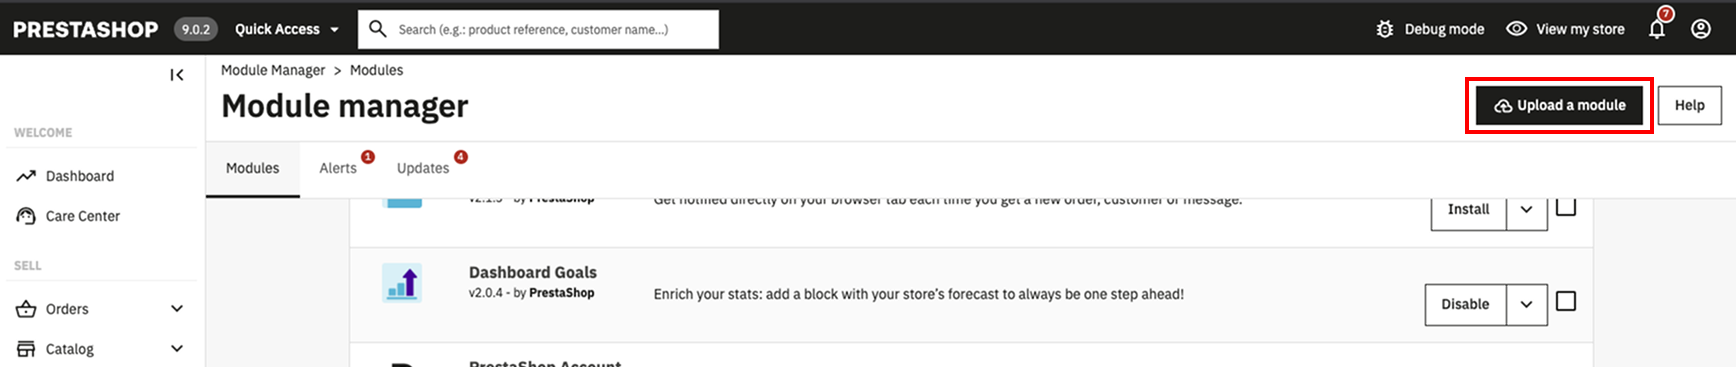
In your PrestaShop back office, navigate to Modules > Module Manager and click Upload a module. Select the downloaded ZIP file.
Step 2 - Automatic setup
The module installs automatically:
- Registers required hooks
- Creates the
ps_qog_saved_orderdatabase table - Sets default configuration values
Step 3 - Configure the module
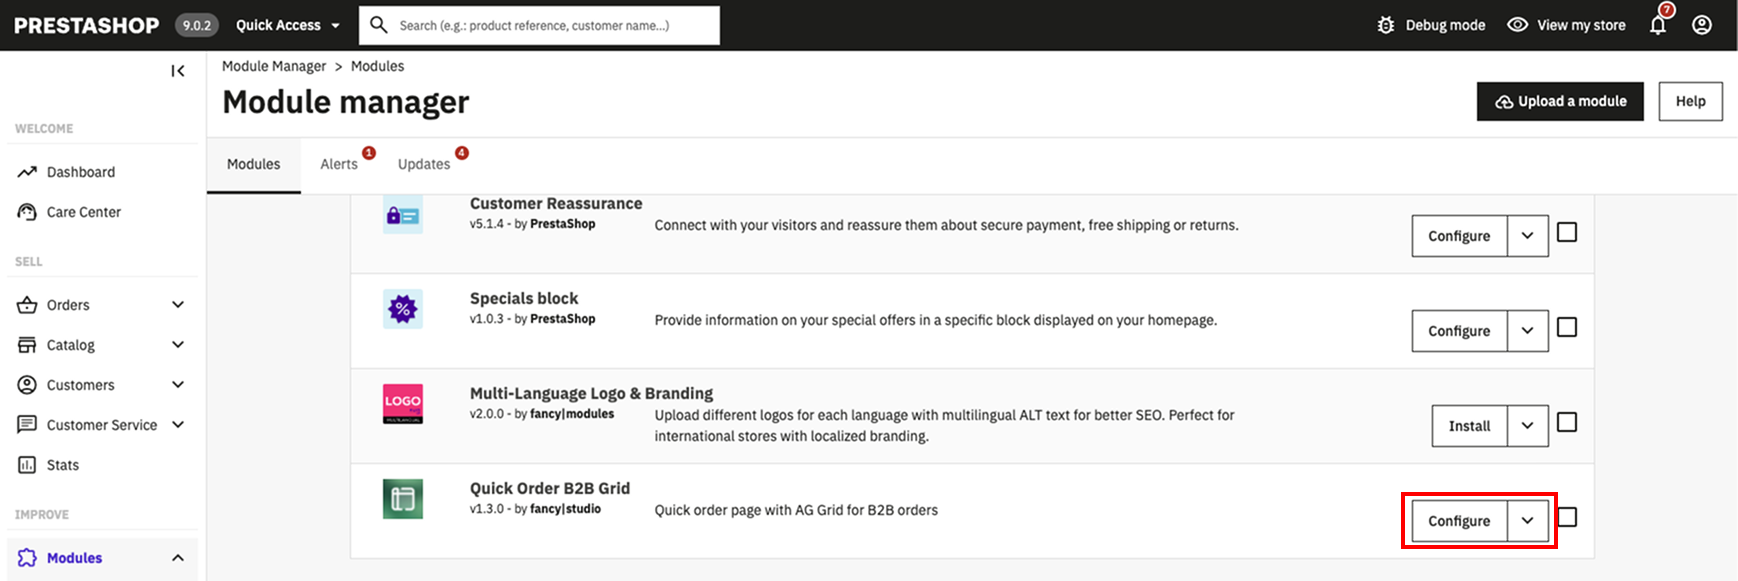
After installation, click Configure on the module card (or navigate to Modules > Module Manager, find "Quick Order B2B Grid" and click Configure).
Step 4 - Verify front page
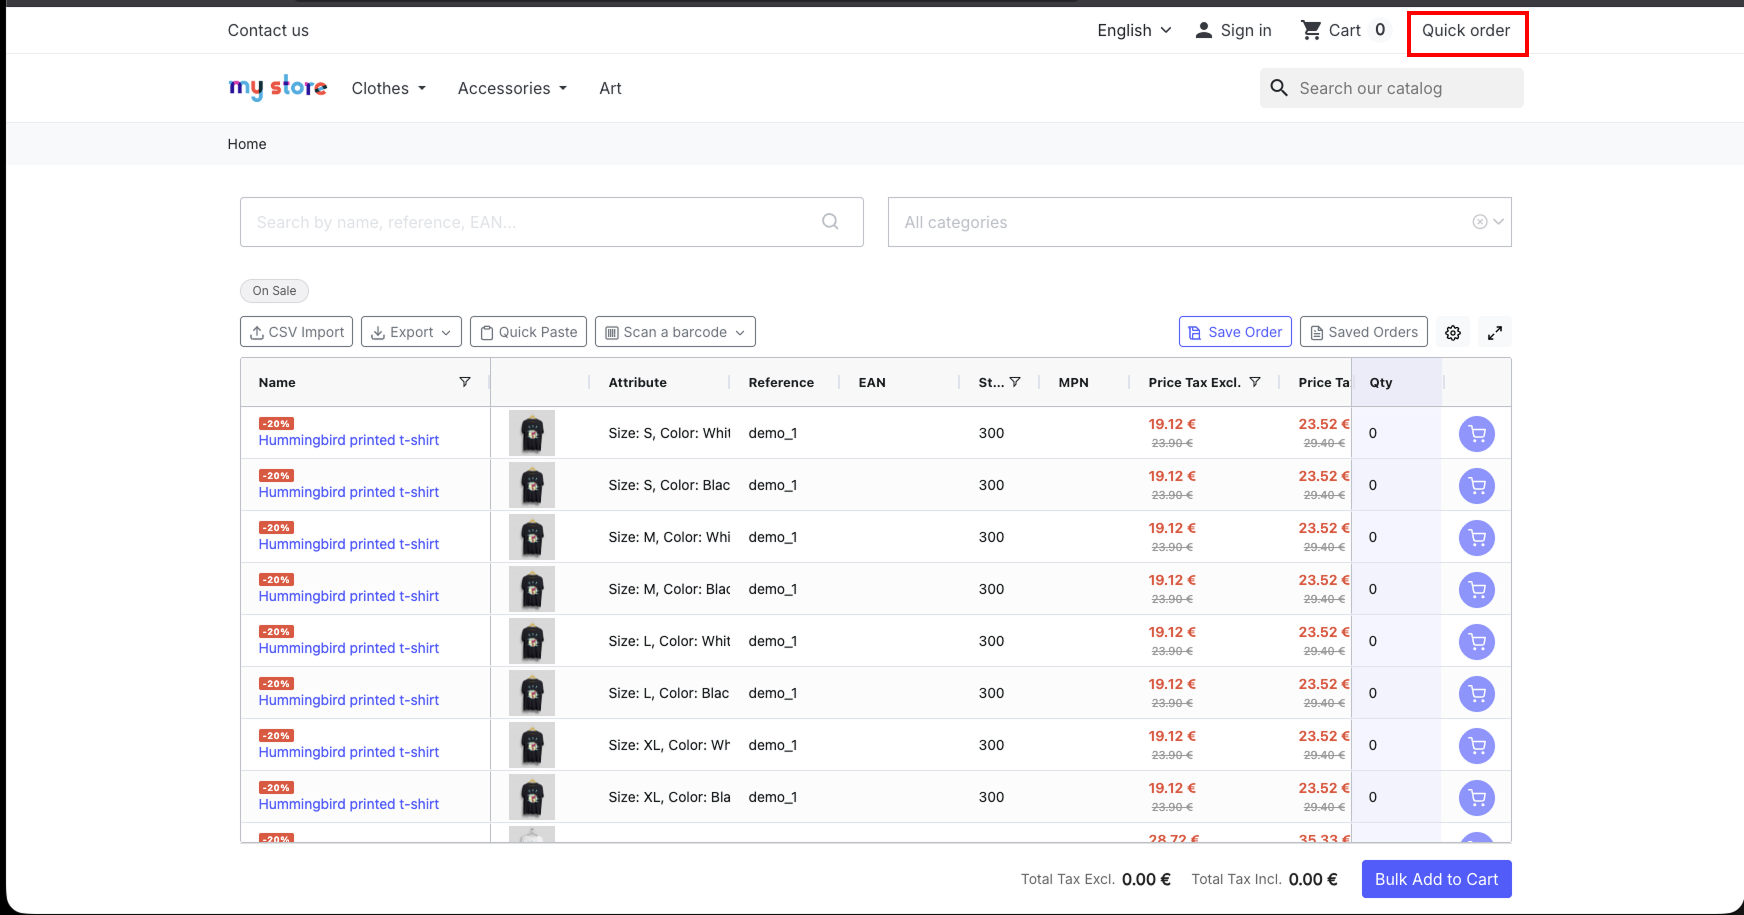
Visit your store front and look for the Quick Order link in the top navigation bar. Click it to verify the page loads correctly.
Uninstallation
To uninstall, go to Modules > Module Manager, find the module, click the dropdown arrow next to Configure and select Uninstall. The module preserves customer saved order data in the database by default.