2. Install & first run
Step 1 — Install from the Shopify App Store
Open the listing and click Add app. Shopify walks you through the standard authorization flow.
Step 2 — Approve the permissions
The app asks only for read permissions up front:
| Scope | Why it's needed |
|---|---|
read_products |
Load the catalog — variants, images, vendor, collections, metafields |
read_inventory |
Show stock levels and respect each variant's inventory policy |
read_customers |
Identify logged-in customers for access control and saved-order storage |
Two more scopes are optional and are only requested later, from inside the app,
if you turn on the feature that needs them: write_draft_orders (for net/gross VAT
pricing) and write_customers.
Click Install to confirm.
Step 3 — Land on the Settings dashboard
After install you land on the app's Settings dashboard. It has five tabs — General, Grid & Columns, Features, Product Display, Styling — and the left-hand app navigation (Settings and Plan & Billing).
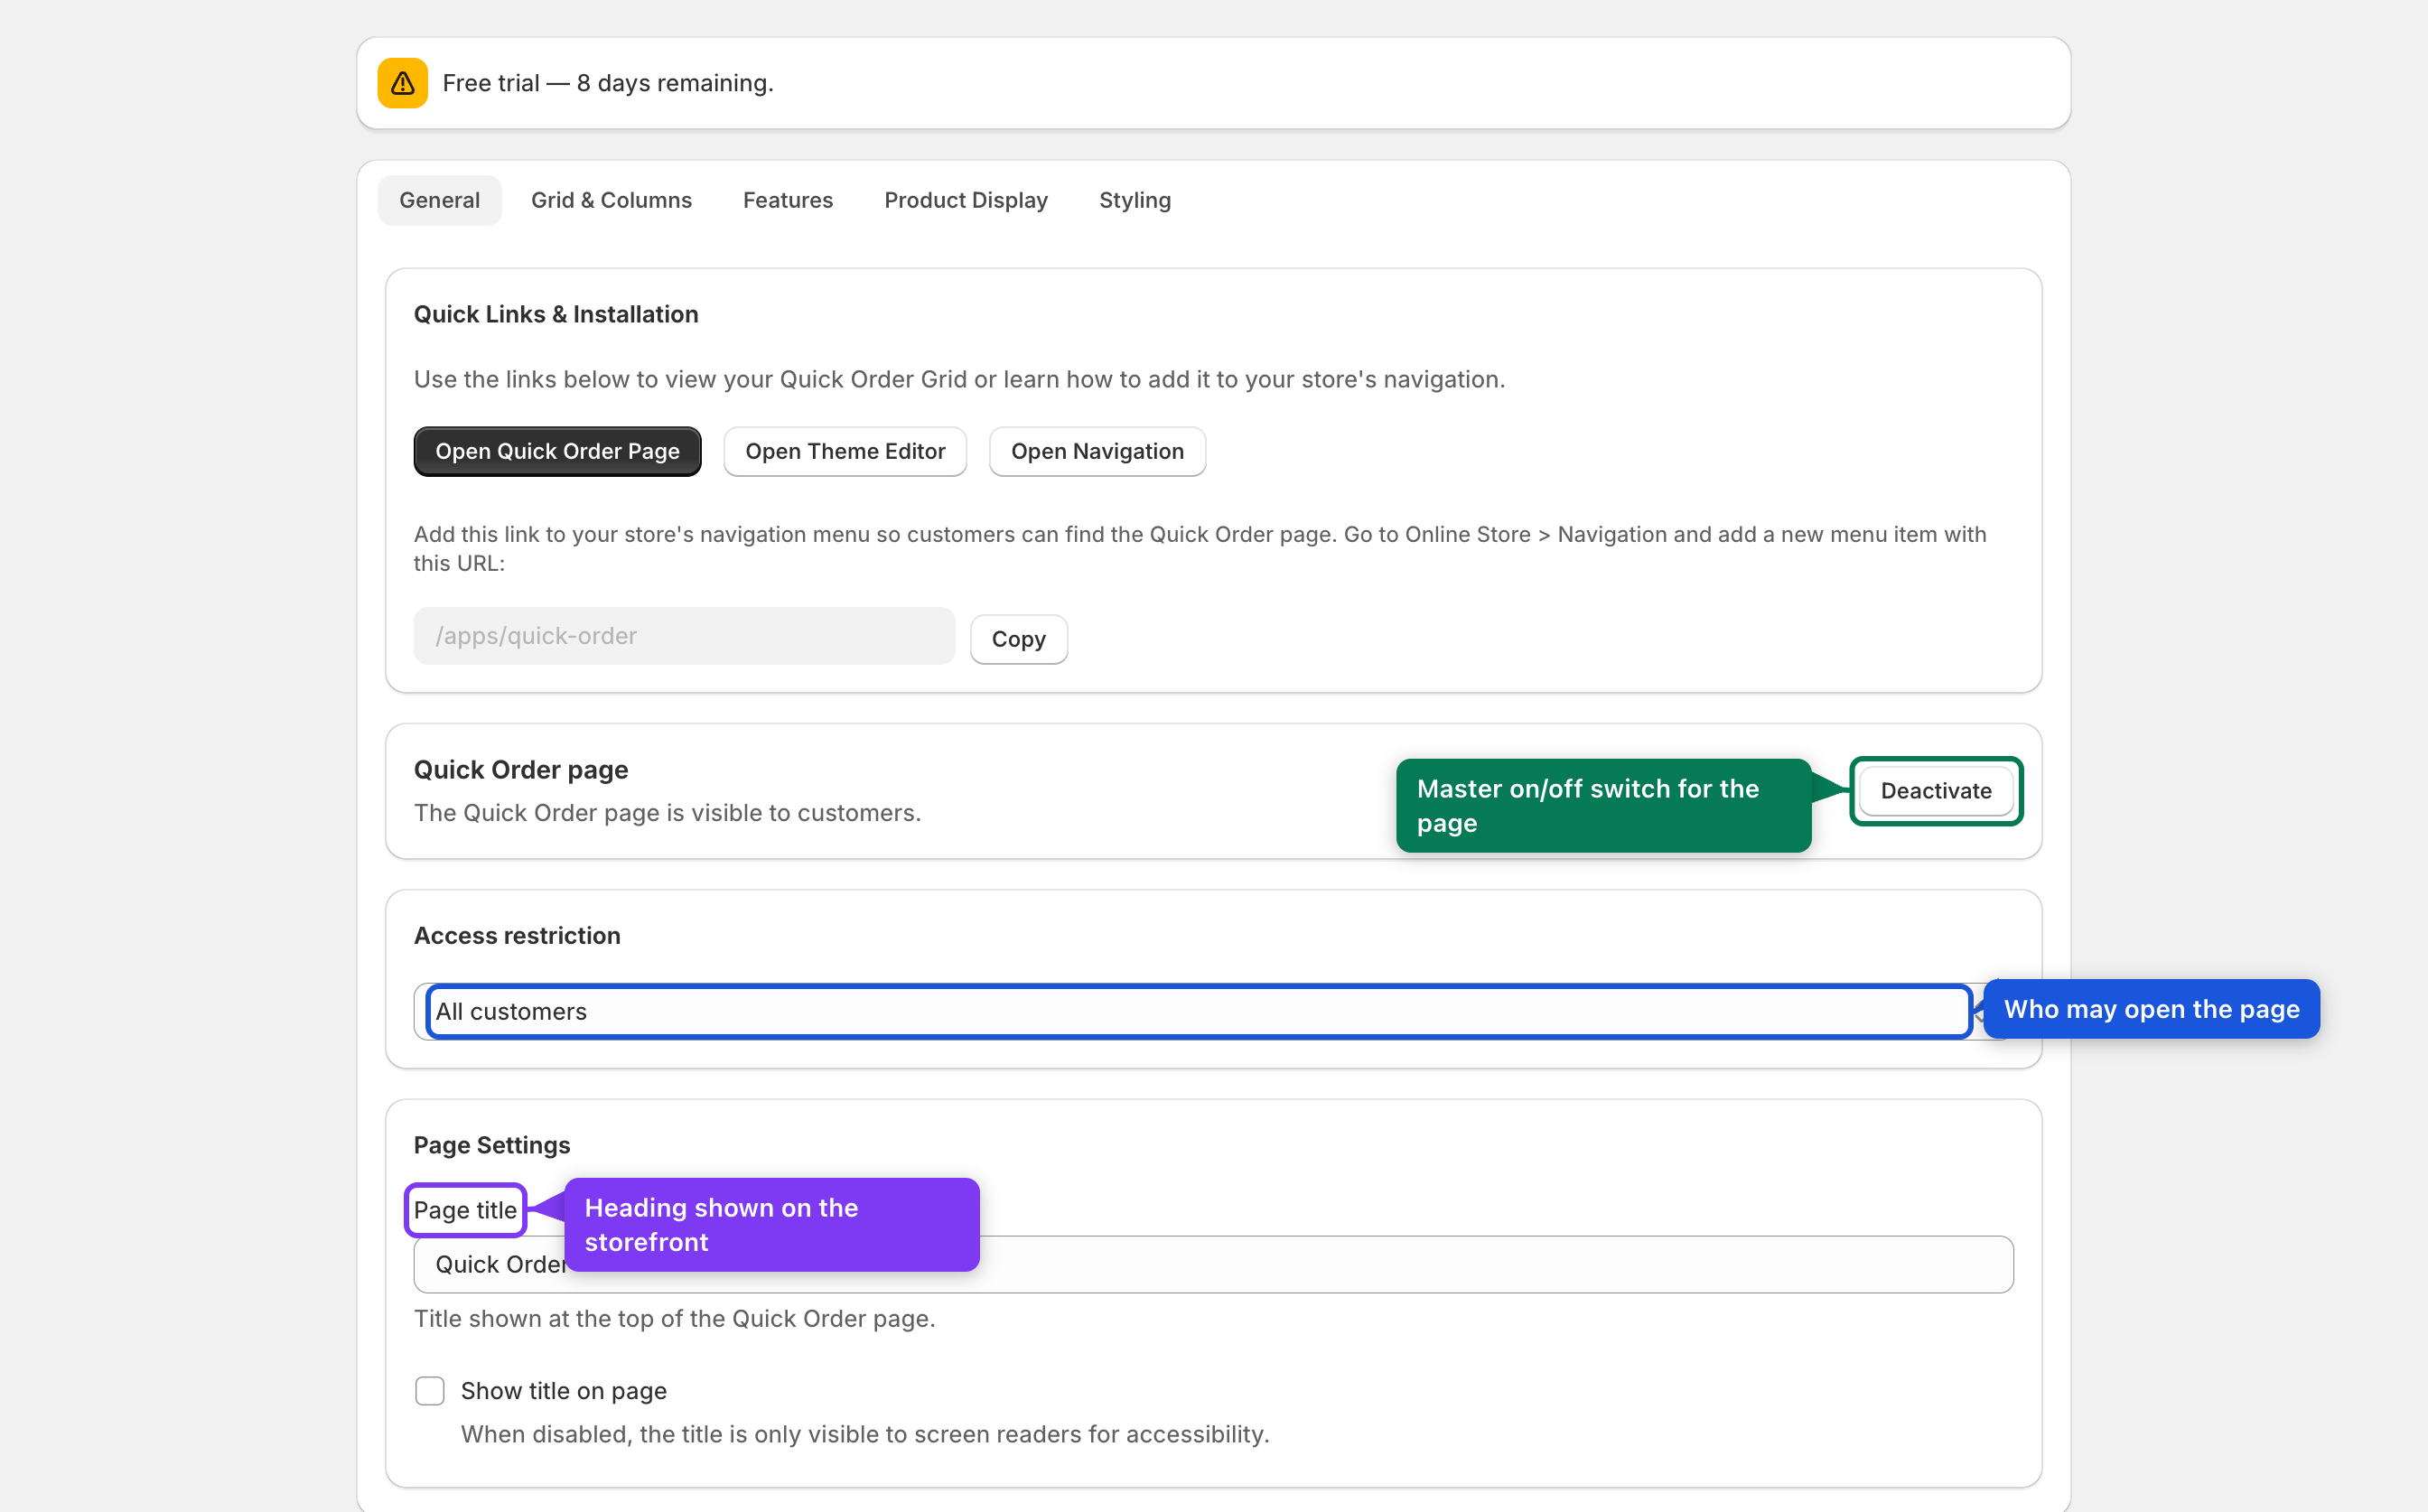
Good to know: the app never blocks the admin UI. If a subscription is required, you'll see a banner (for example "Free trial — 8 days remaining") — you are not redirected away.
What happens automatically
- A per-shop session is stored
- Webhooks are registered:
app/uninstalled,app/scopes_update,products/*,app_subscriptions/update, plus the three GDPR compliance topics (customers/data_request,customers/redact,shop/redact) - Default settings are seeded
- A shop metafield
app.metafields.billing.activeis written so the Theme App Extension can hide its blocks when a subscription lapses
Uninstalling
Shopify admin → Settings → Apps and sales channels → Quick Order B2B Grid →
Uninstall. The app/uninstalled webhook then removes all shop data: sessions,
app settings, the billing cache, saved order templates, and per-customer grid layouts.