2. Installation and upgrade
Requirements
| Minimum | |
|---|---|
| PrestaShop | 1.7 or newer, including all 8.x and 9.x versions |
| PHP | 7.1 or newer (as your PrestaShop version requires) |
| Theme | Any theme that outputs one of the standard positions displayAfterBodyOpeningTag, displayBanner or displayBeforeBodyClosingTag (Classic, Hummingbird and practically all commercial themes do) |
| Browser for the back office | A current Chrome, Edge, Firefox or Safari with JavaScript enabled |
The image folder /img/sideadbanners/ must be writable by the web server. The module creates it during installation.
Install the module
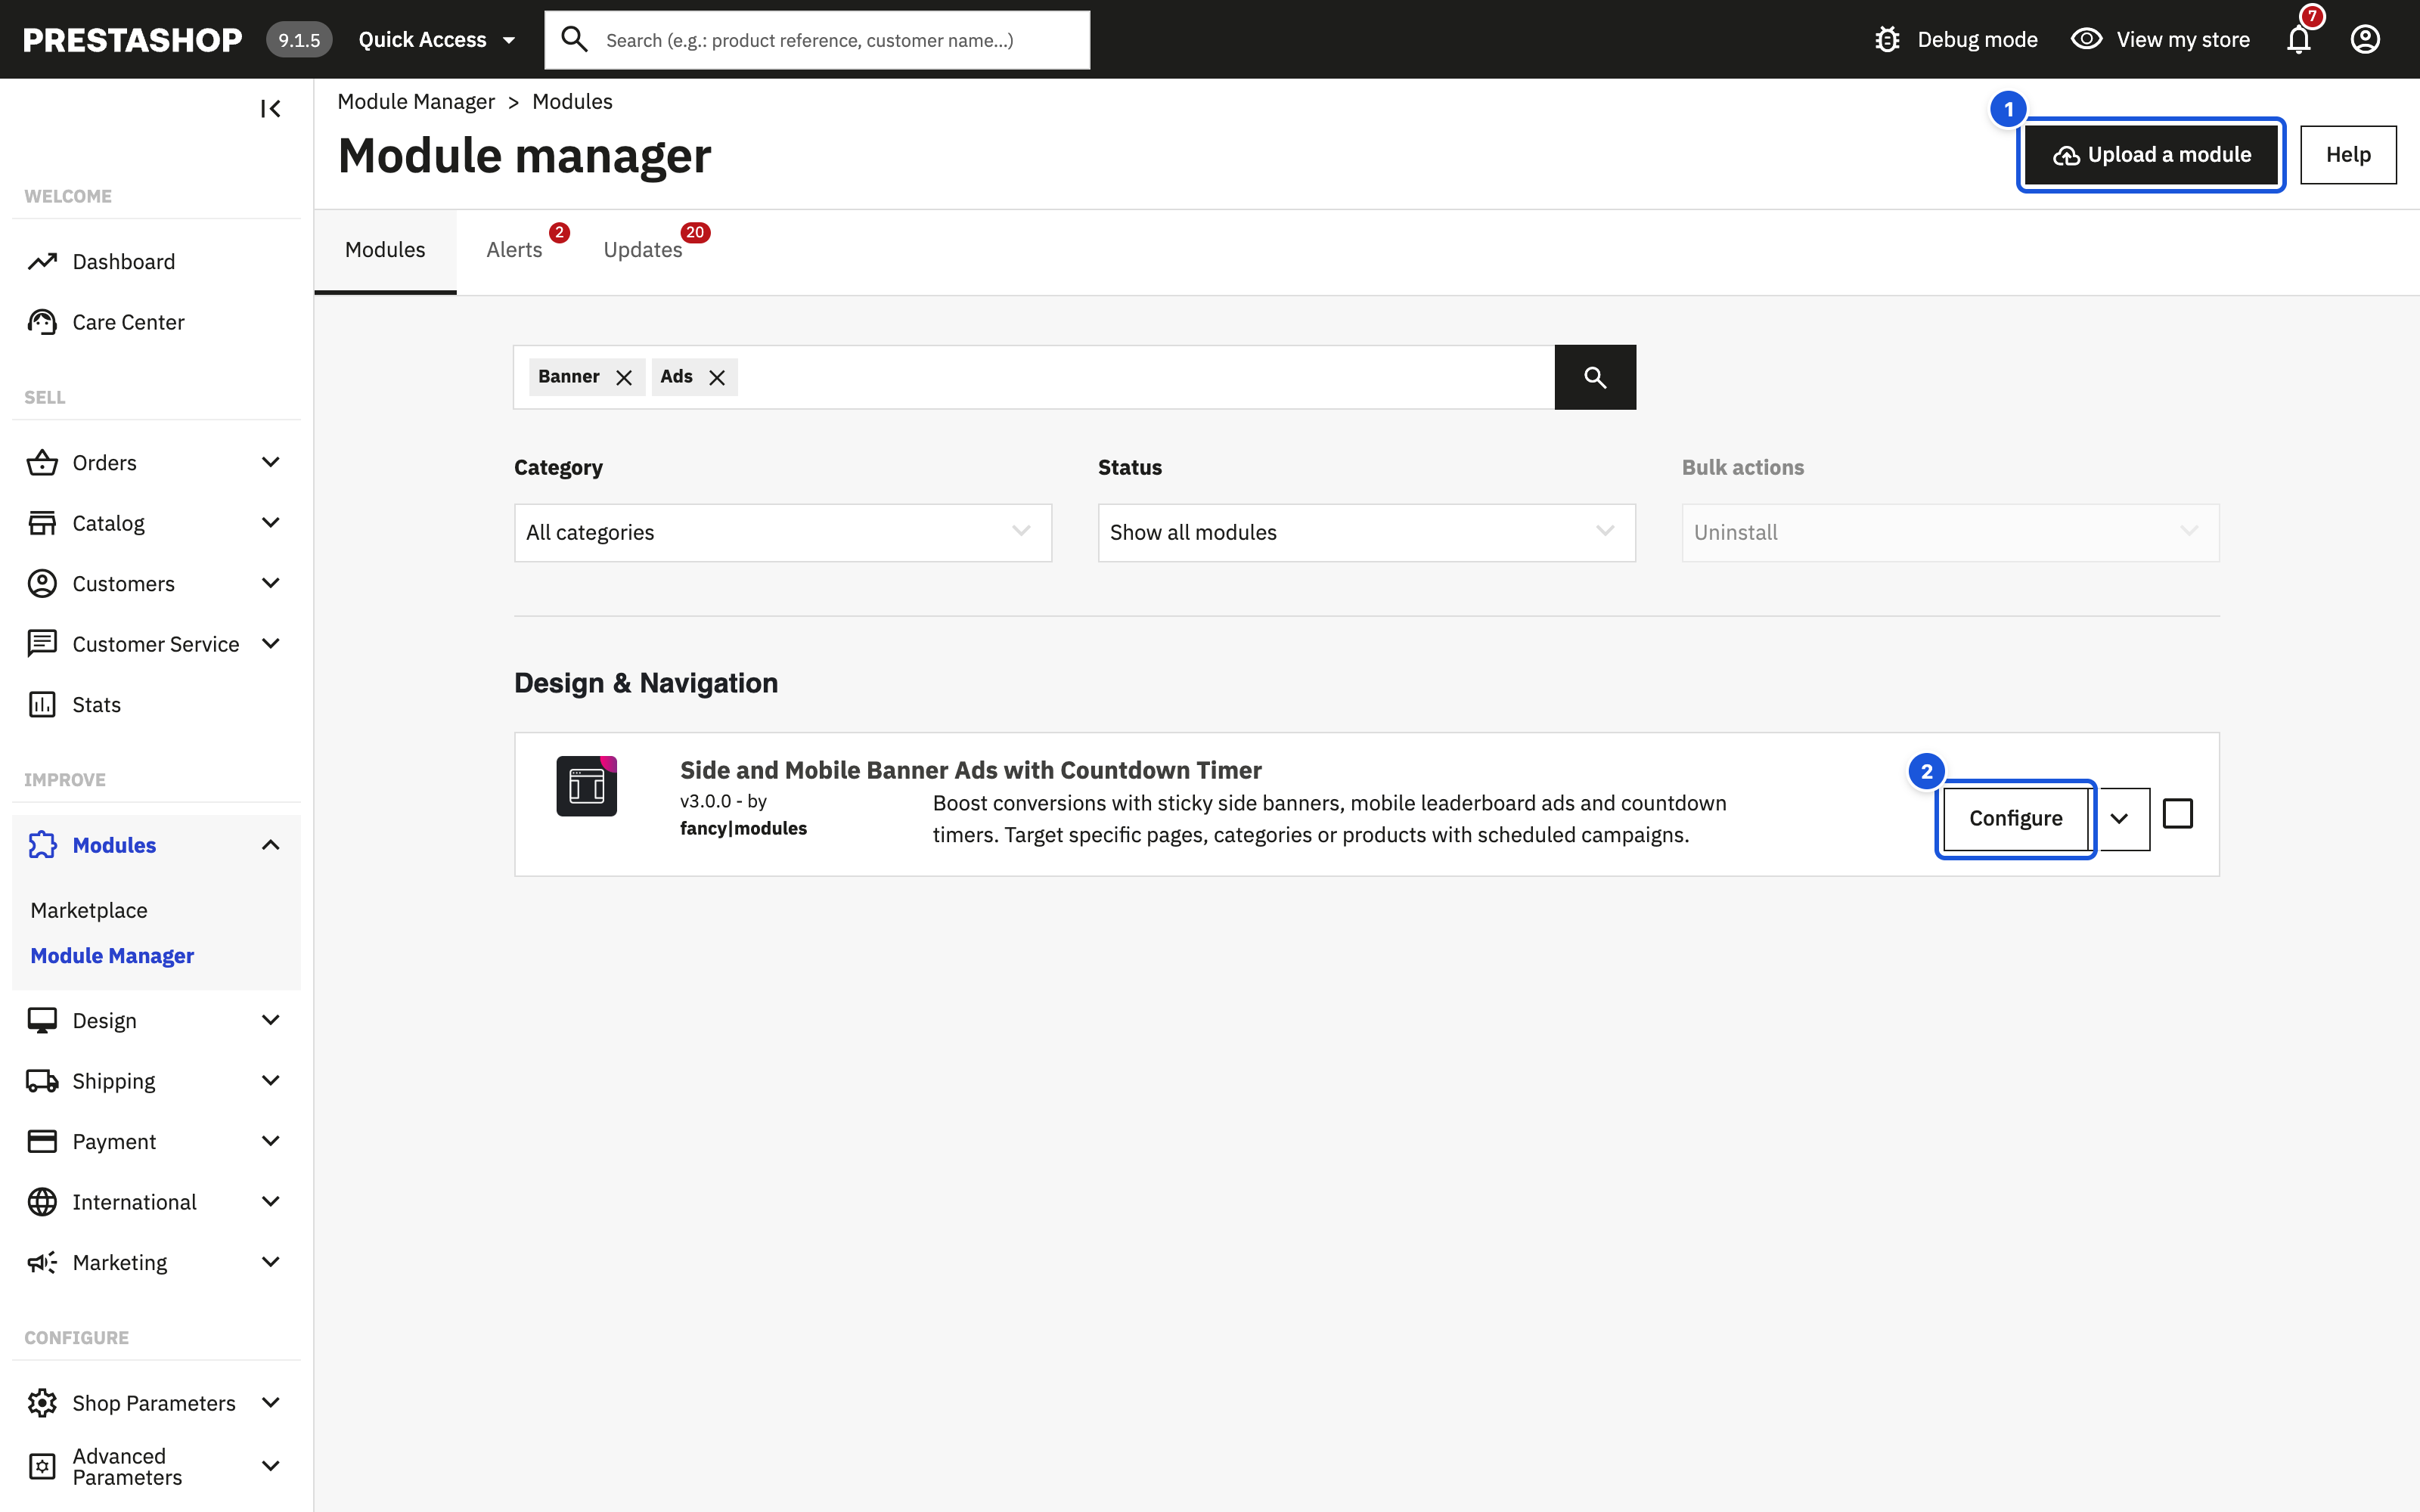
- In the back office go to Modules > Module Manager.
- Click Upload a module (1) and select the ZIP file you downloaded from PrestaShop Addons.
- Wait for the confirmation, then click Configure (2).
The module opens on the Campaigns page with a Getting started box:
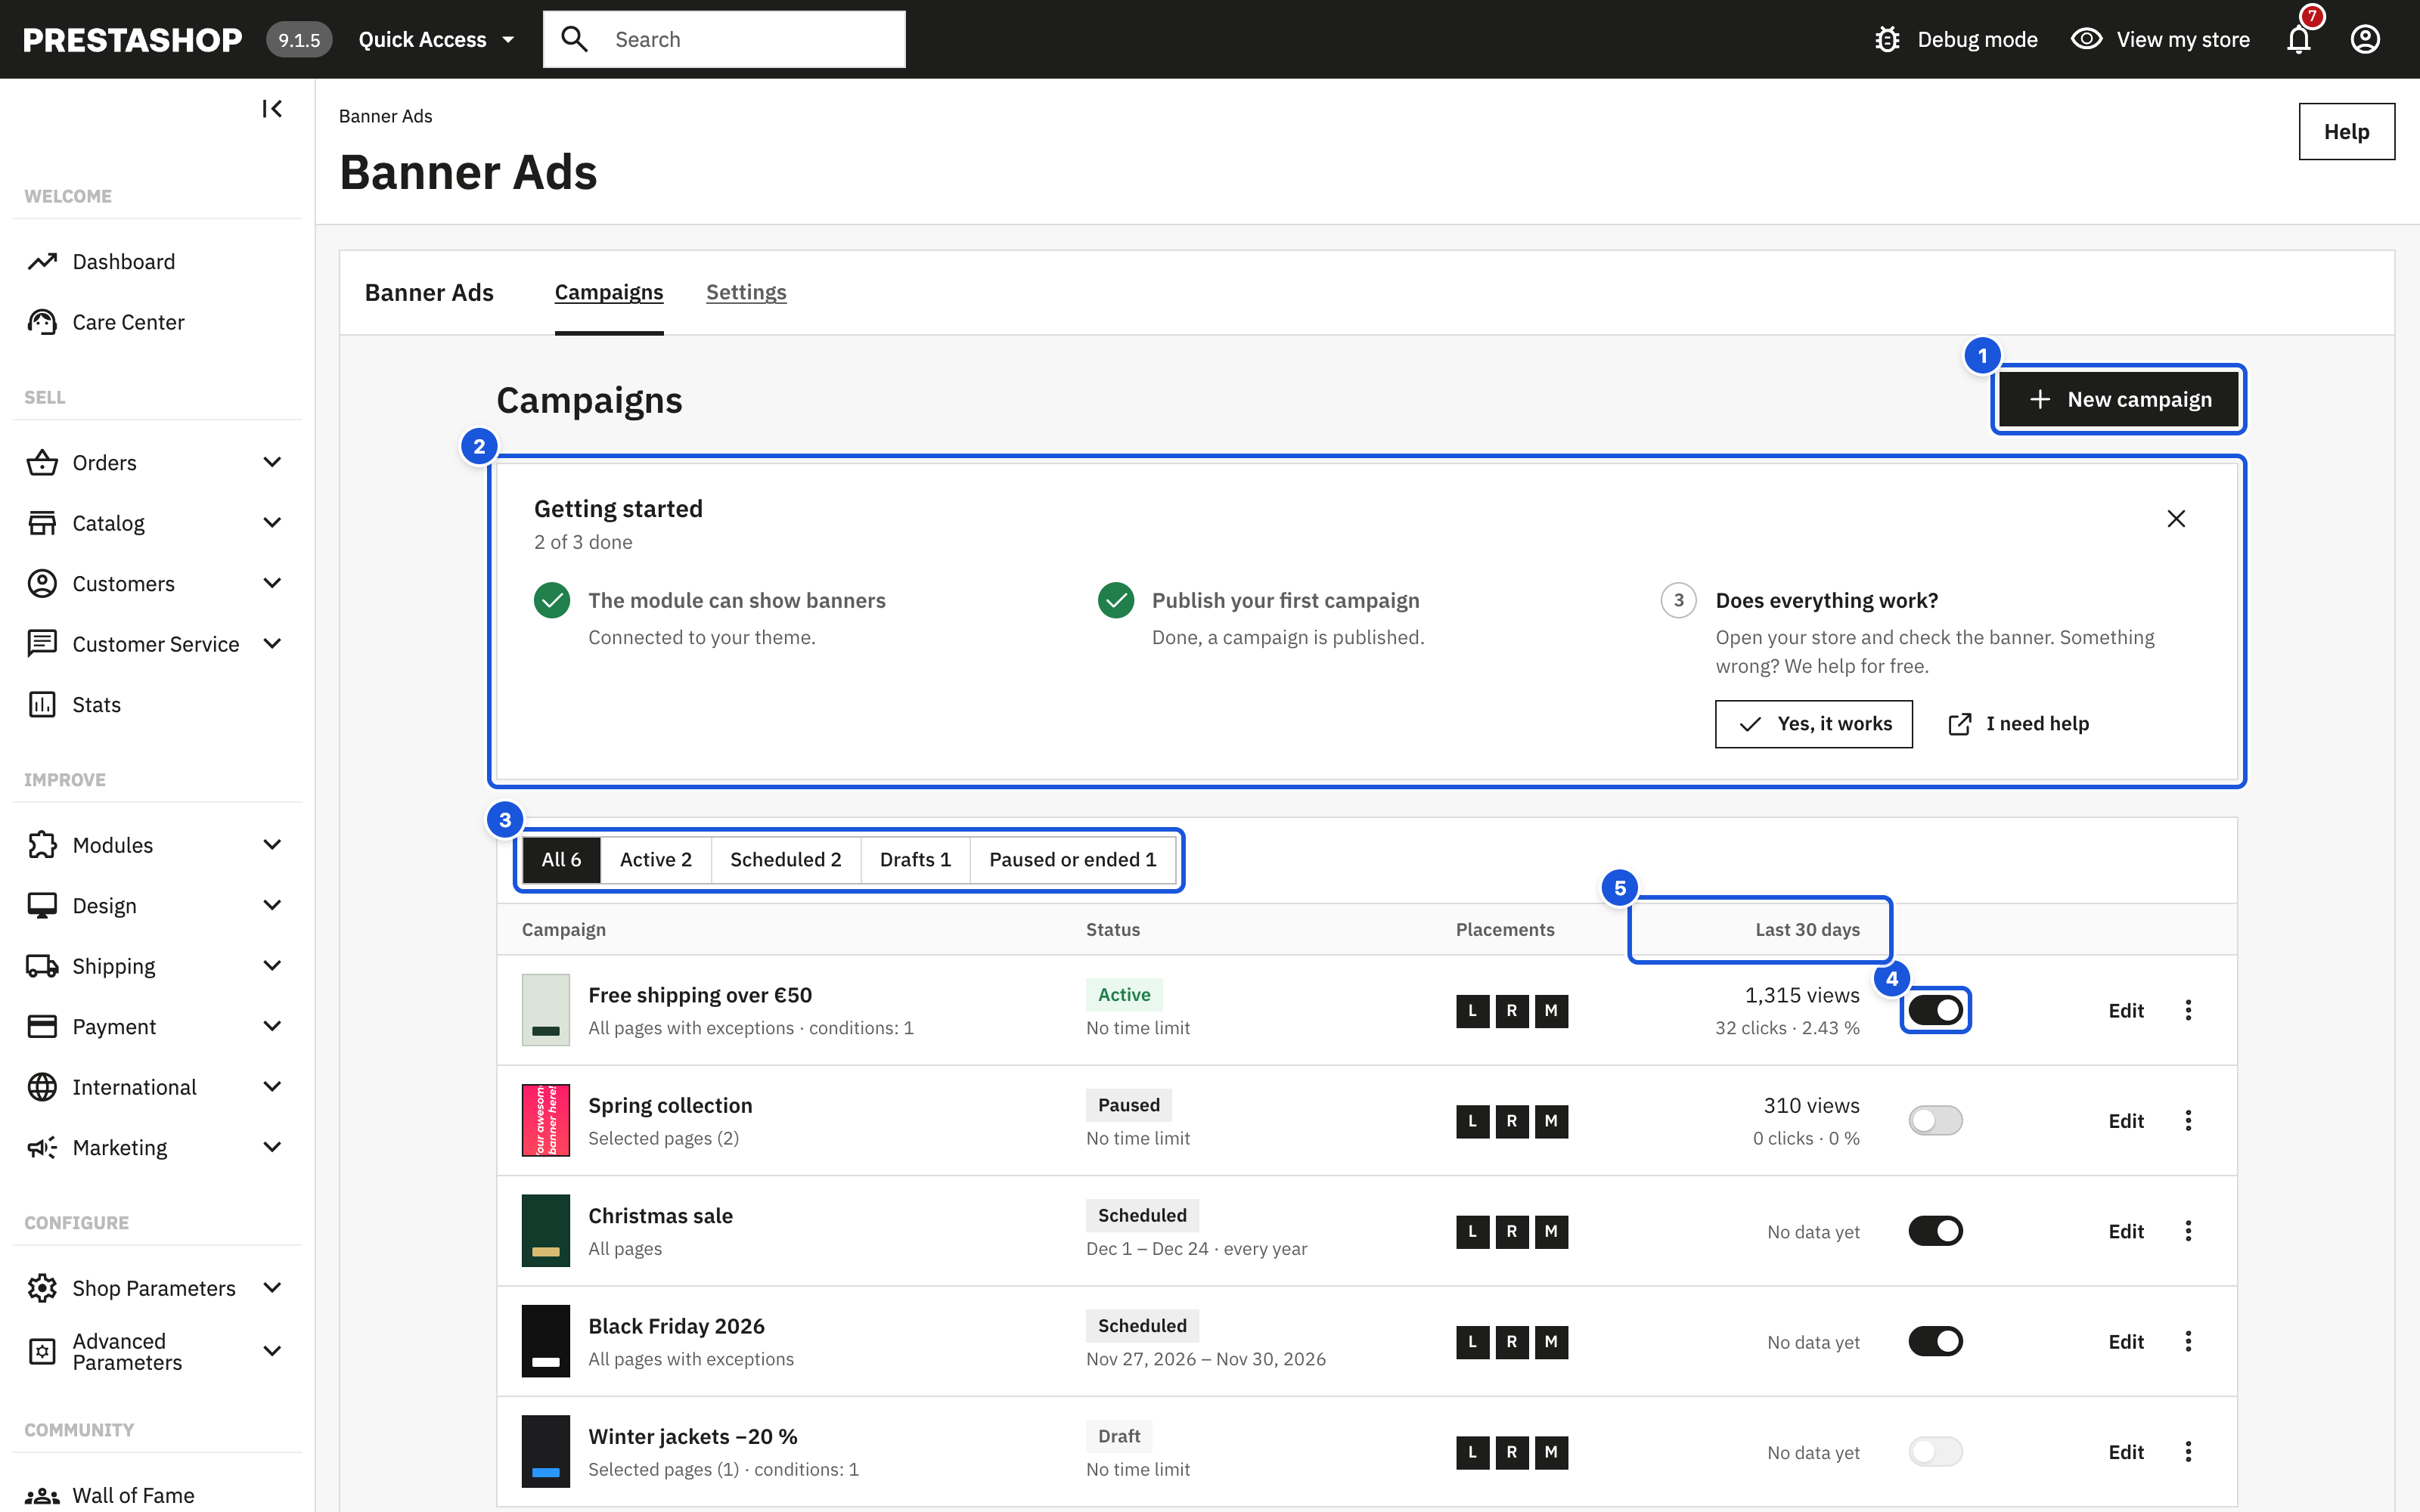
- New campaign
- Getting started – checks that the module works in your theme
- Filters by status
- Switch a campaign on or off
- Views, clicks and click rate of the last 30 days
| Step | What it checks |
|---|---|
| The module can show banners | The module is enabled and attached to at least one of the positions it uses (displayAfterBodyOpeningTag (right after the opening <body> tag), with displayBanner and displayBeforeBodyClosingTag as fallbacks). If not, the box tells you what to do. |
| Publish your first campaign | At least one campaign is published. After a fresh installation this step is still open, because the sample campaign is only a draft. |
| Does everything work? | Open your store and check the banner. Click Yes, it works or I need help. |
You can close the box with Hide getting started.
The sample campaign
A new installation adds a campaign called Sample Global Banner with sample images, saved as a Draft. Nothing appears in your store until you publish a campaign. Open the sample to explore the editor and the preview, publish it to test the module in your store, or delete it (see Campaign list). To create your own campaign, follow the Quick start.
Upgrading from version 2.x
Upload the new ZIP in Modules > Module Manager the same way as a new installation. PrestaShop runs the upgrade automatically. Your campaigns keep running during and after the upgrade.
What is migrated automatically
| From 2.x | In 3.0 |
|---|---|
| Your banners | Become campaigns with the same name, pages, customer groups, dates, priority, close button and auto-hide settings. They use the Own image content type. |
| Banner images | Are copied into the new media library. The original files stay where they were. |
| Left and right banners with identical image, link and description in every language | Are marked Same as the left side, so you edit them once. |
| Countdown texts | 2.x had one text per banner; it is copied into every language, so you can now translate it. |
| Countdown style and entrance animation | Are kept, also when you open and save the campaign in the new editor. |
| Remember close values that are not in the new list (for example 48 hours) | Stay selectable, shown as After 48 hours. |
| Global settings (widths, distance from the top, sticky mode, custom CSS) | Are kept unchanged. |
| Mobile banner | Becomes the Bar. Also on computers and tablets is off, because 2.x never showed the mobile banner on computers. Tick it if you want an announcement bar on every screen. |
| Shops (multistore) | Every campaign is assigned to all shops that exist at upgrade time, so nothing changes for shoppers. A shop created later gets the campaigns when you import the data of an existing shop with Banner Ads ticked; otherwise tick it in the campaign (Where & who > Shops). |
| Category campaigns | Keep Also subcategories switched off, so they appear on the same category pages as before. One improvement: products now show the campaign when they belong to a selected category, not only when it is their default category. |
New in 3.0 and set to safe defaults: When side banners do not fit is set to Show the bar, and Content container of the theme is empty (found automatically).
After the upgrade
- Open the module (Configure). The Getting started box confirms that the module is connected to your theme.
- Open one of your campaigns and look at the preview on Wide screen, Laptop and Mobile.
- If you used Custom CSS in 2.x, check that your rules still apply. The storefront markup is new in 3.0; see Advanced settings for the new CSS classes. The most common 2.x selectors (
.fancy-baner-left,.fancy-baner-right,#mobile-ad-banner-wrapper) still exist. - If an image file of a 2.x banner was missing on the server, the upgrade skips it and writes a warning to Advanced Parameters > Logs ("Banner Ads 3.0.0 upgrade: image files not found"). Upload the image again in the campaign.
Note: Upgraded campaigns keep their 2.x countdown colours until you save them in the new editor for the first time. From then on the countdown uses the campaign's Background and Headline colours from the Design tab.
If you replaced the module files by FTP instead of uploading the ZIP, simply open the module page once: it completes the missing upgrade steps automatically.
Uninstalling
Uninstalling removes all campaigns, statistics and settings, and deletes the images of the media library from /img/sideadbanners/. Download any images you want to keep first.