3. Quick start: your first campaign
This takes about two minutes. You start from a template, check the preview, and publish.
After installation the list already contains Sample Global Banner. It is a Draft, so your store shows nothing yet. You can ignore it, publish it for a quick test, or delete it.
1. Pick a template
- Open the module (Modules > Module Manager > Configure).
- Click New campaign.
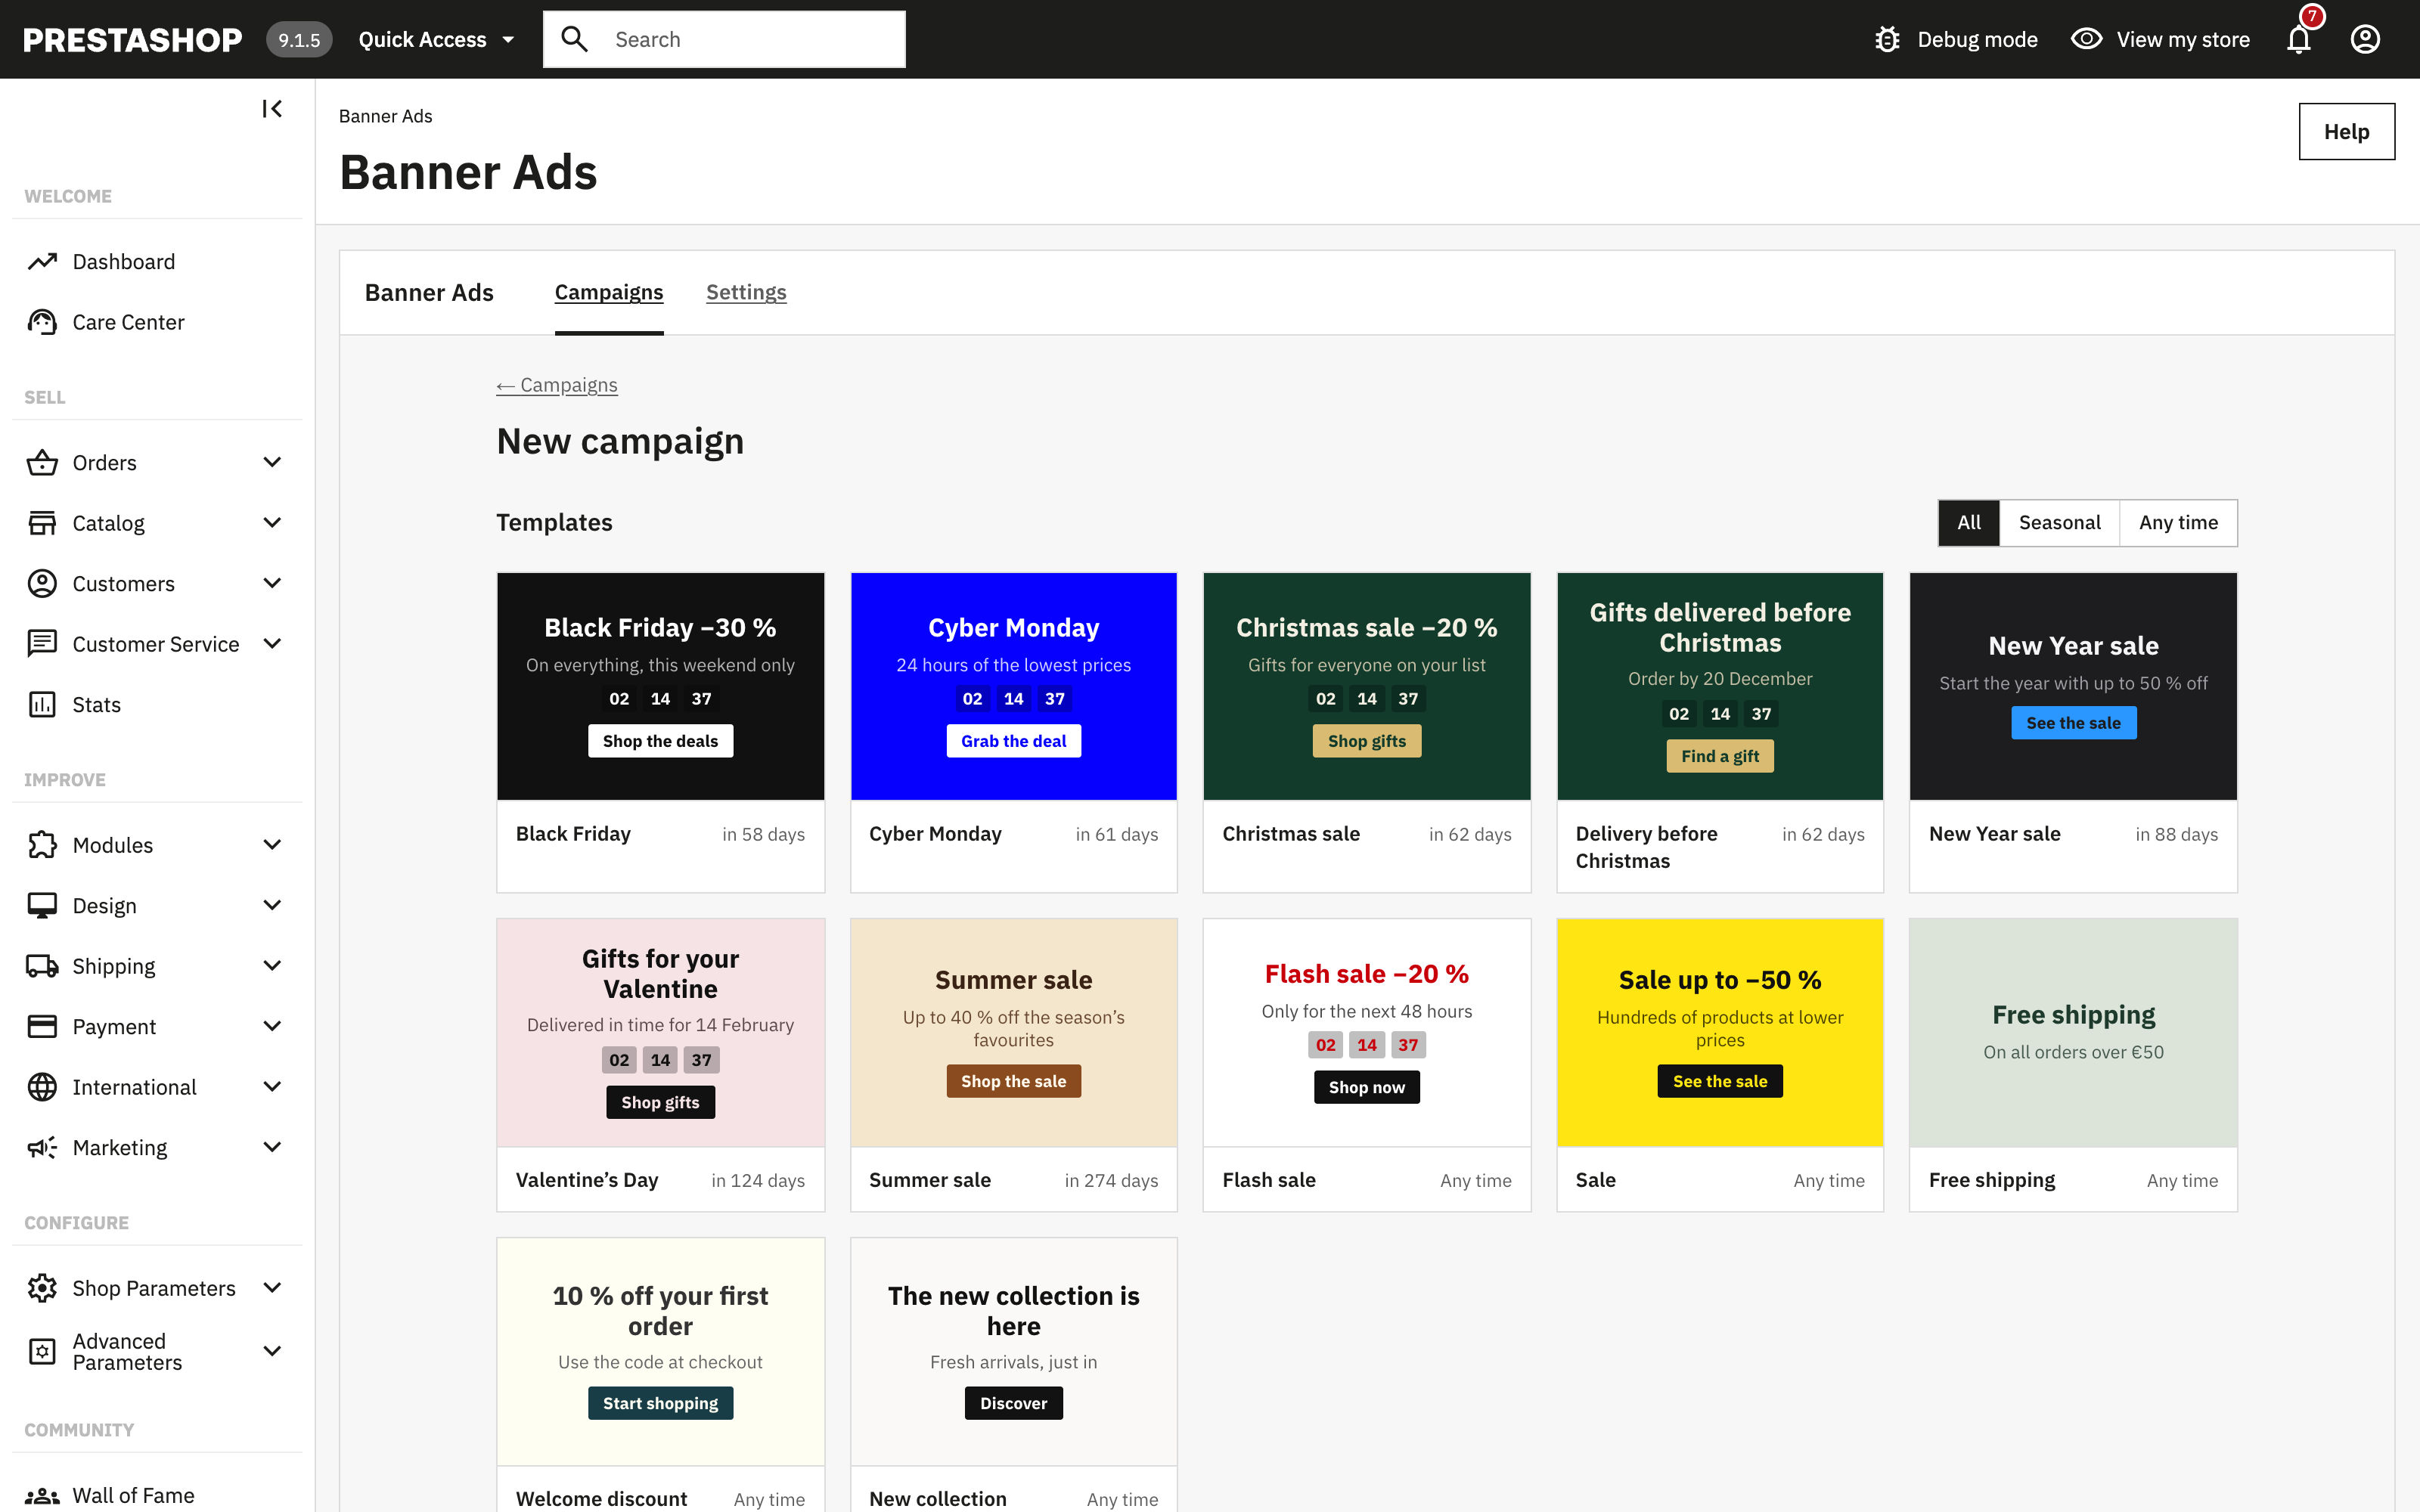
- Under Templates, click the template you want, for example Free shipping or Black Friday.
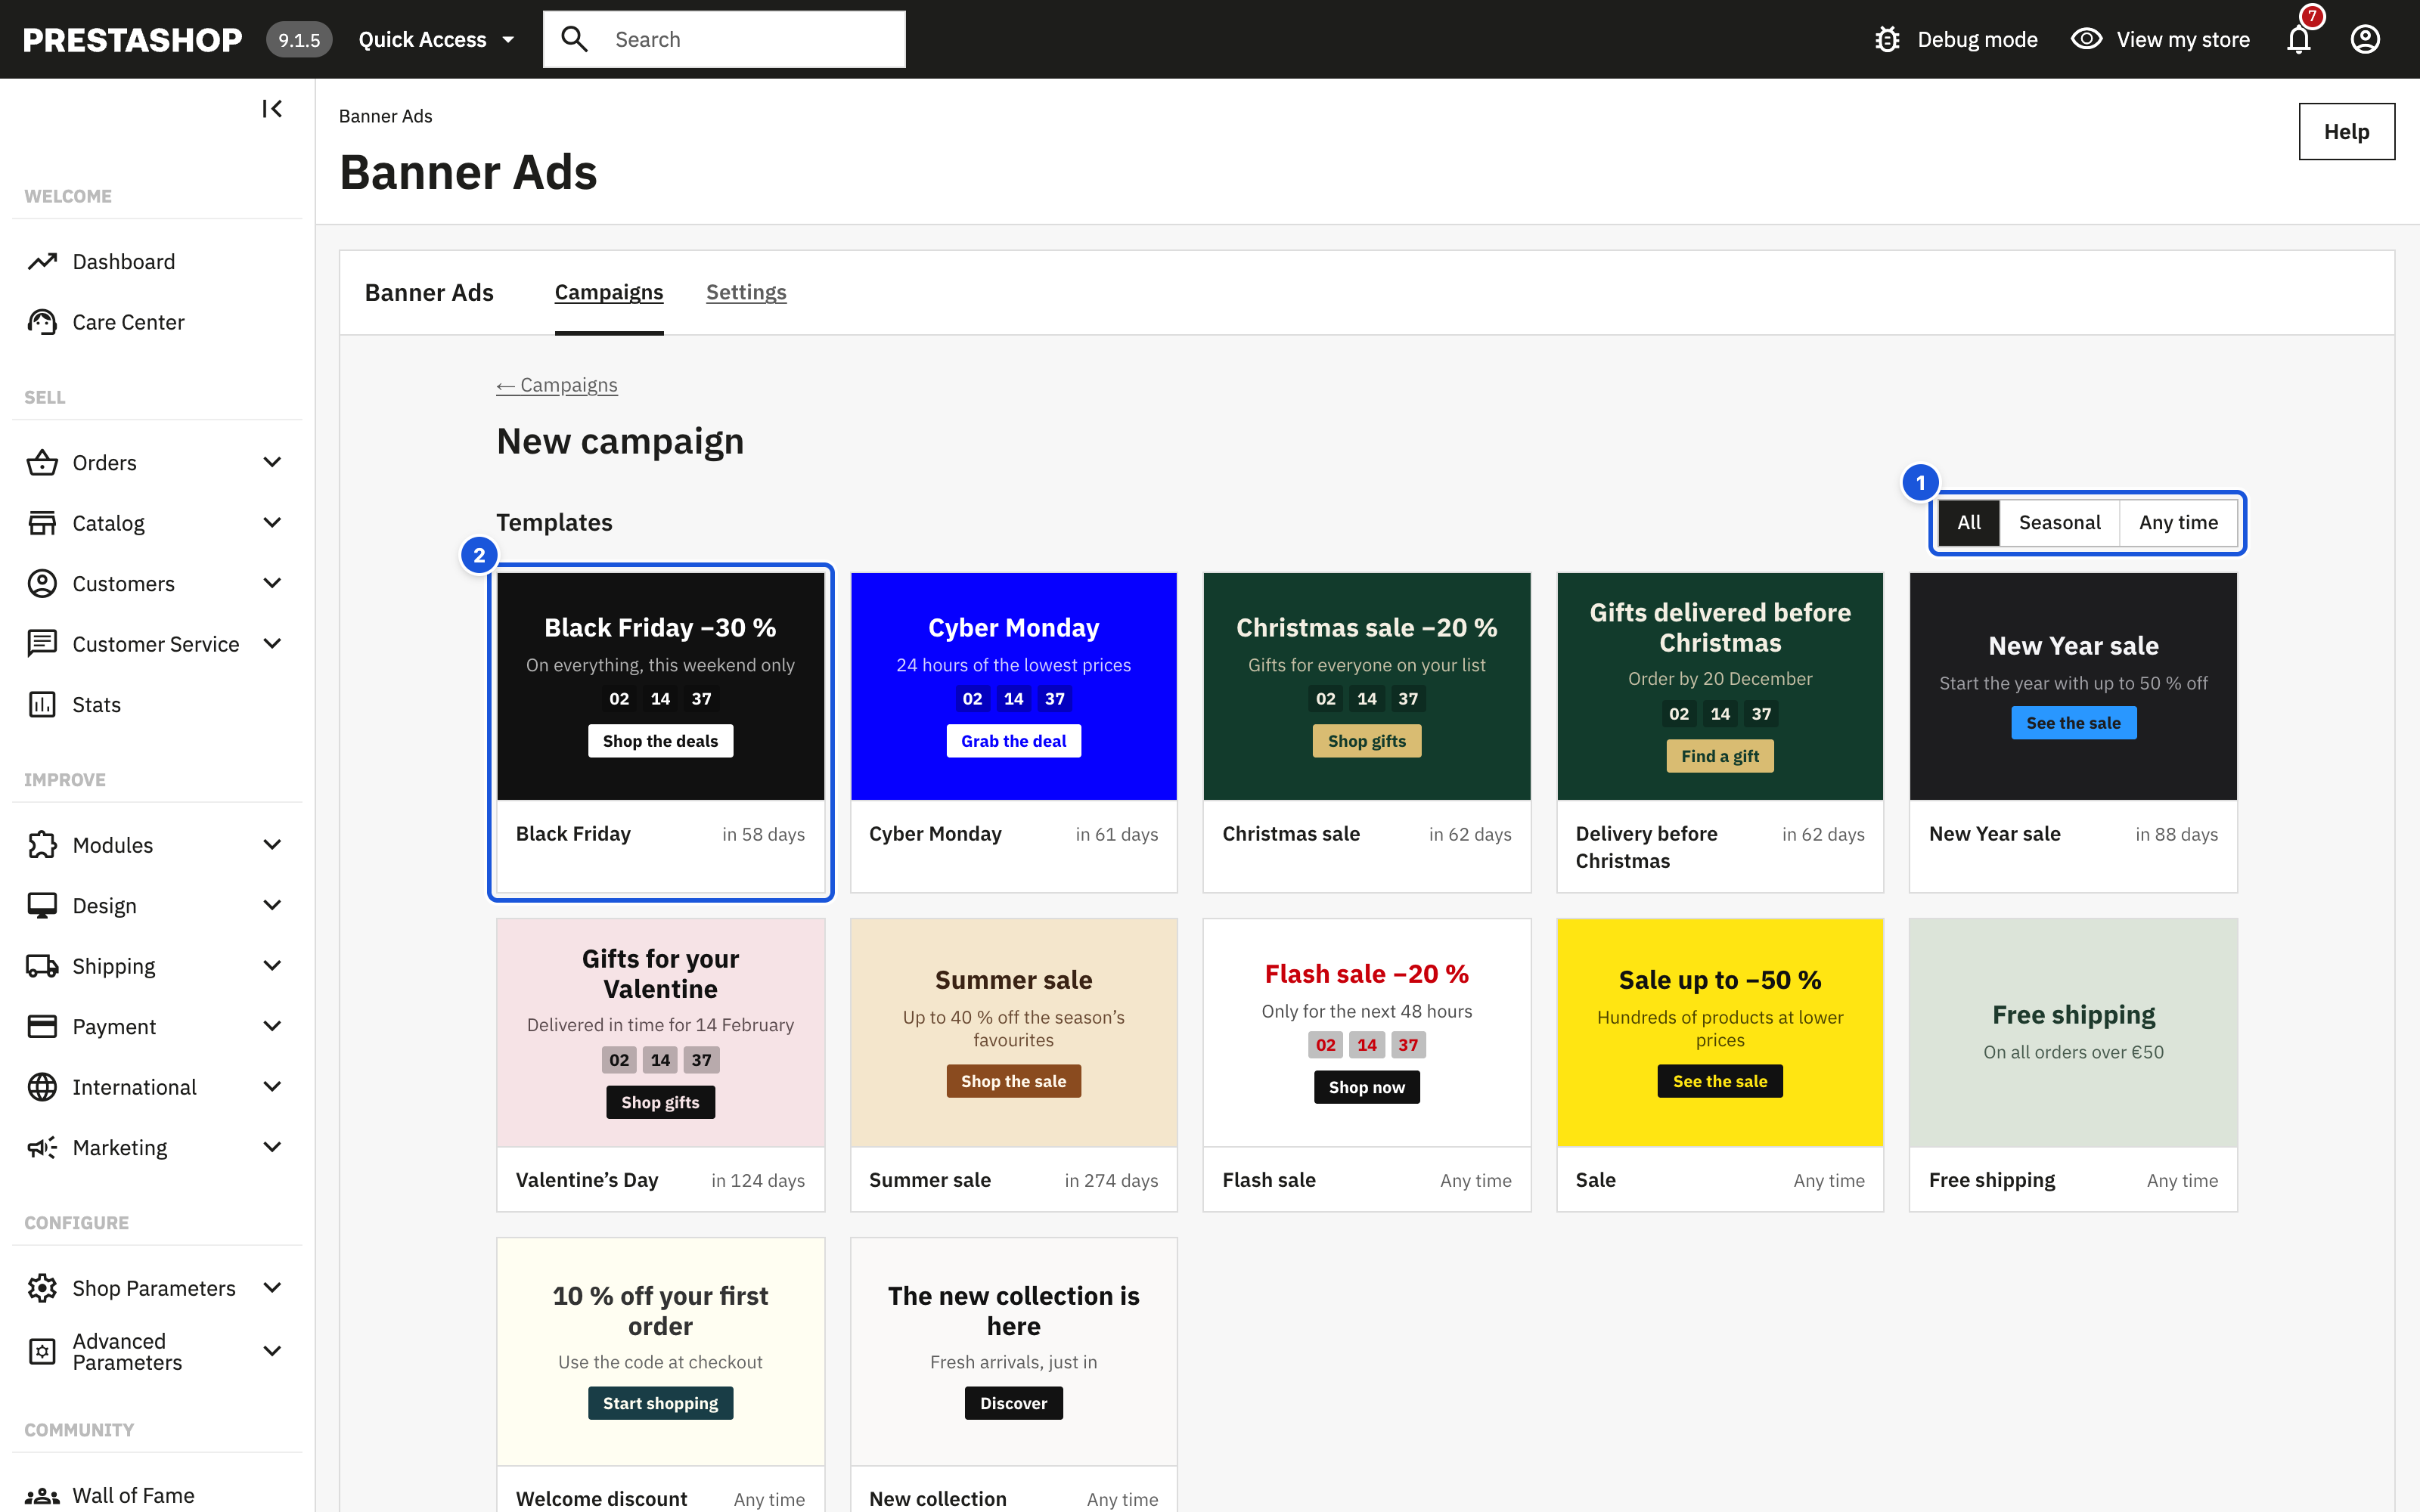
- Show all templates, only seasonal ones or those for any time
- Click a template: texts, style and dates are filled in
Below the templates, Or start from scratch offers an empty campaign:
- Design from scratch – a designed banner built from your texts and colours
- Use your own images – banners made by your designer
Seasonal templates show when their next season starts (in 12 days, Running now). Templates under Any time can run immediately. See Templates for the full list.
The editor opens with the texts, colours and dates of the template already filled in, in every language of your store.
2. Adjust the texts
The Content tab is open. Under Texts:
- Change the Headline, for example "Free shipping over €50".
- Change or clear the Supporting text, Discount code and Button.
- In Link, start typing the name of a product, category or CMS page and pick it from the suggestions. The link then follows the shopper's language automatically.
If your store has several languages, switch the language at the top of the editor and check the texts there too. A dot next to a language means something is still missing in it.
Discount codes: the module shows the code, it does not create it. Create the matching cart rule in Catalog > Discounts first.
3. Check the preview
The right half of the editor shows your real store with the banner. Use the buttons above it to switch between Wide screen, Laptop and Mobile, and the Page menu to see a category or product page.
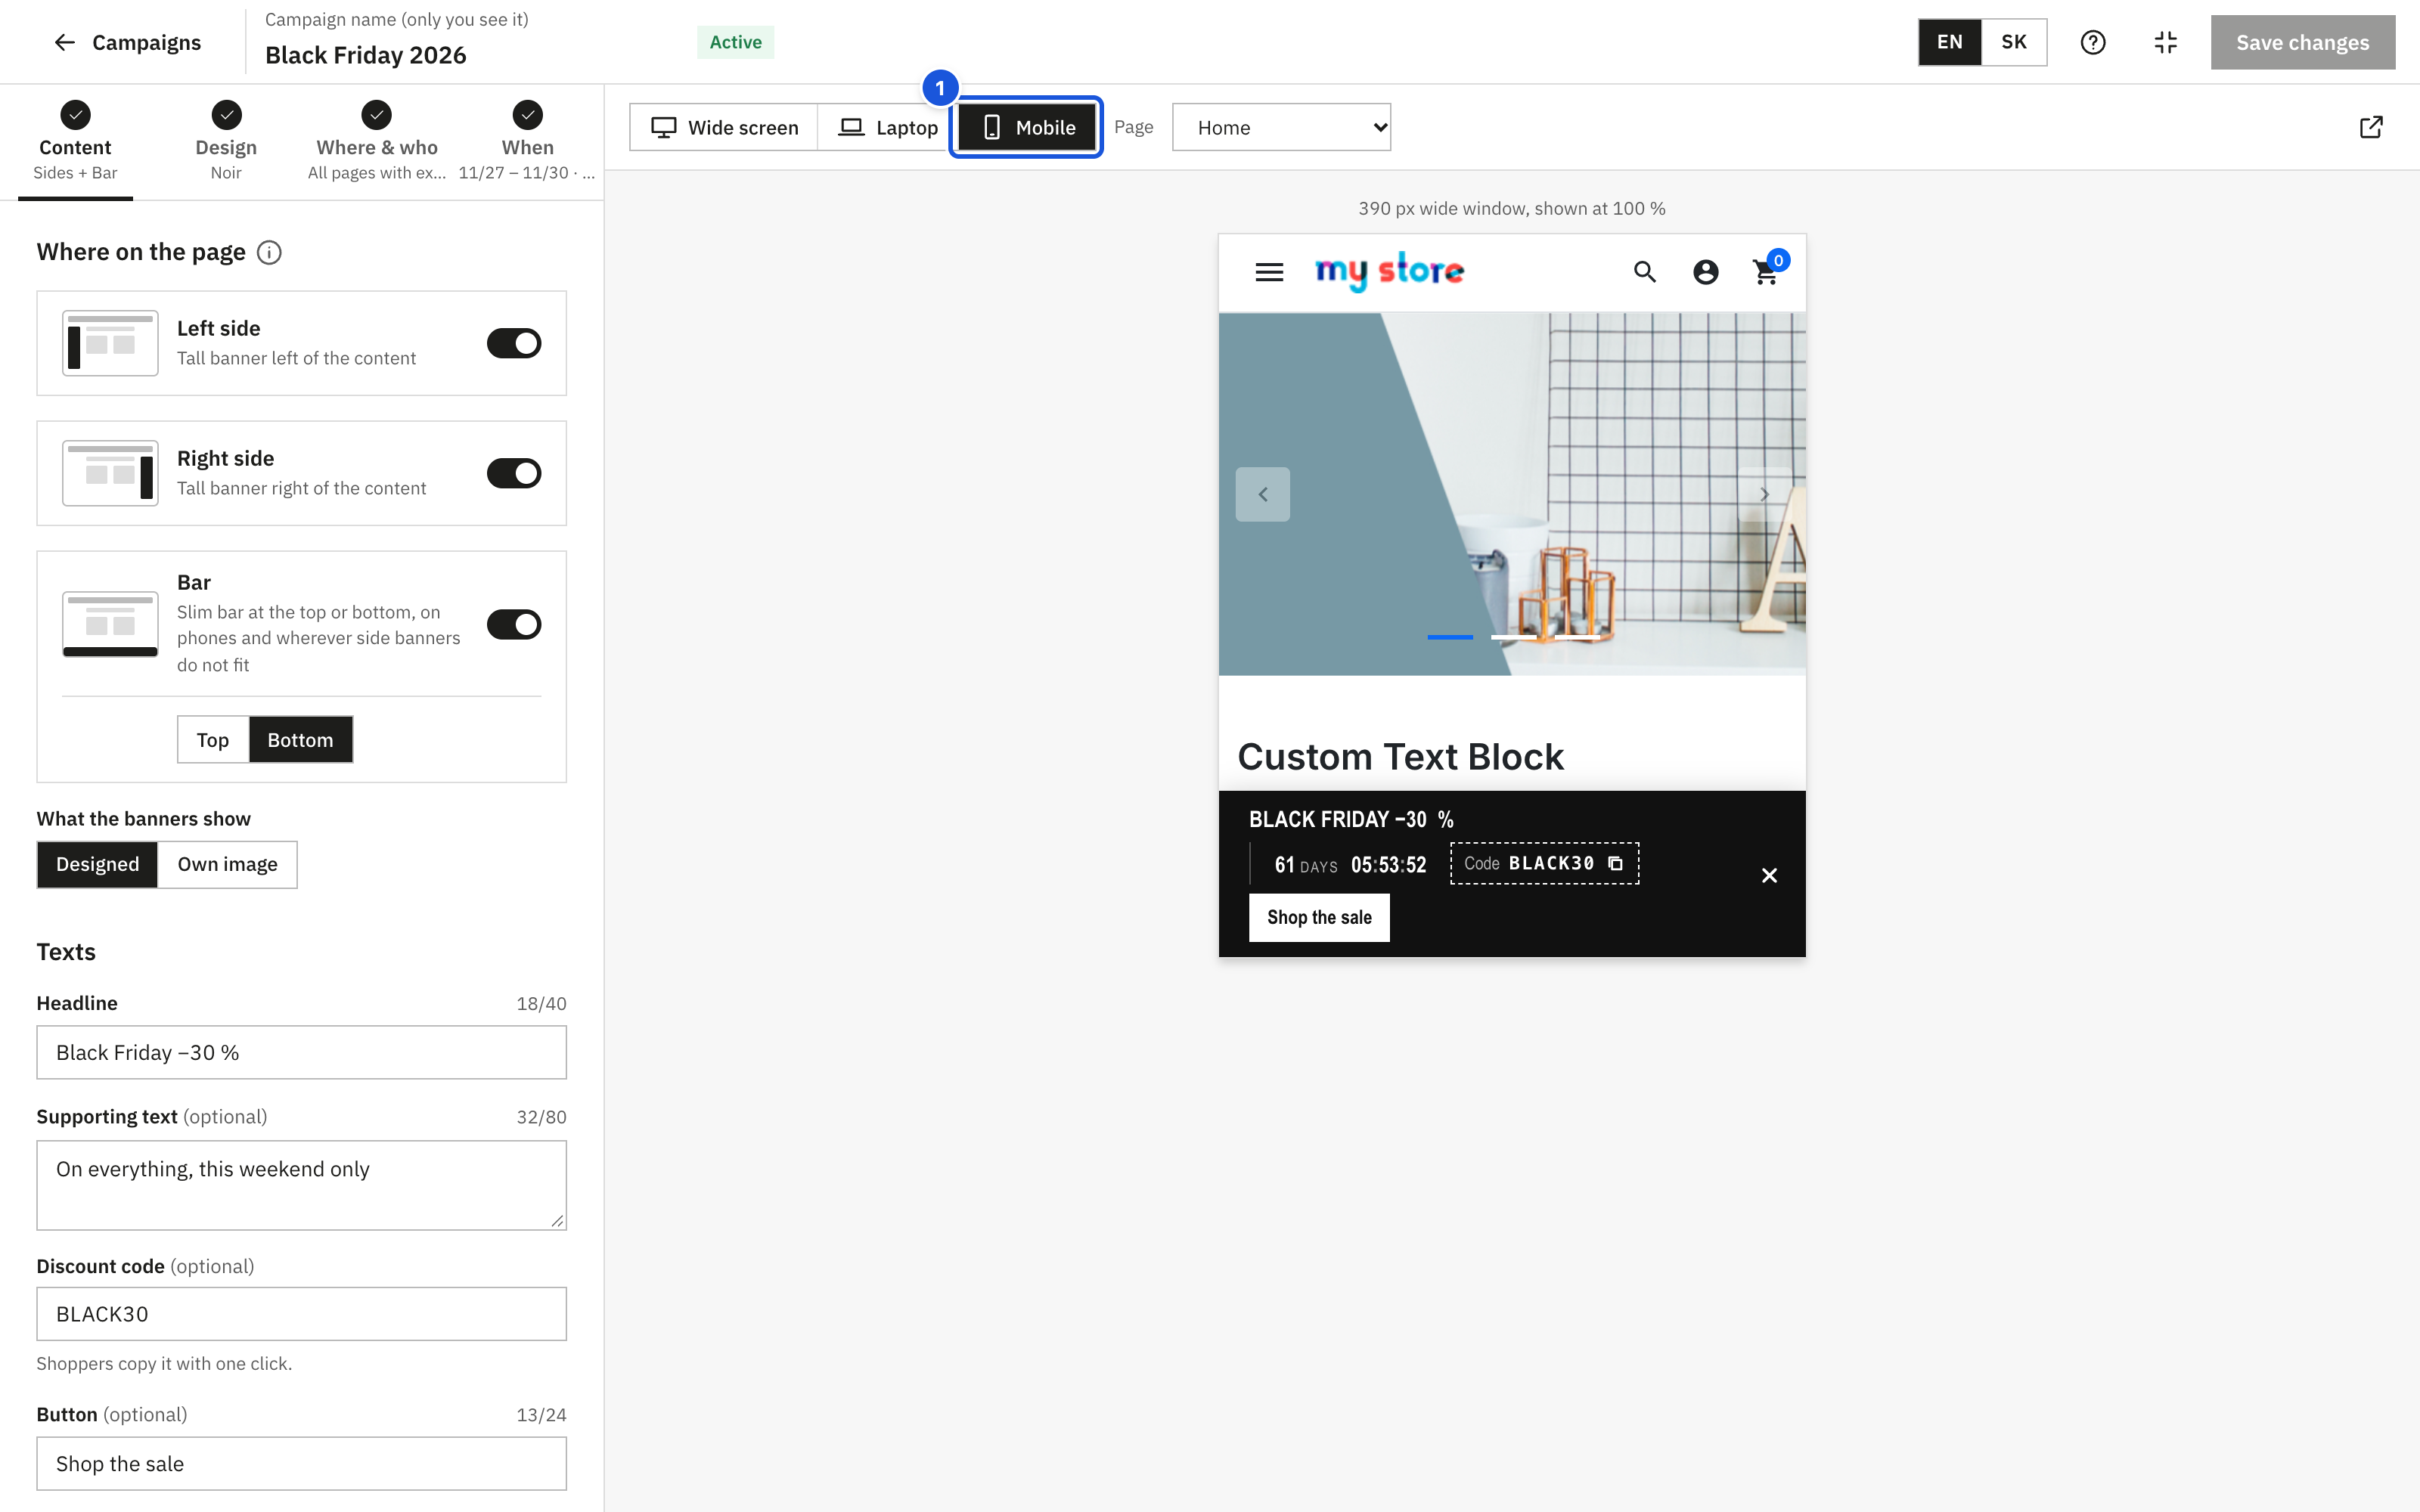
Want different colours? Open the Design tab and click another style.
4. Choose where and when (optional)
- Where & who: by default the campaign shows on All pages to All shoppers.
- When: seasonal templates come with dates; evergreen templates start Now and end Never. You can change both.
5. Review and publish
- Give the campaign a name in Campaign name (only you see it) at the top (the template fills in its own name).
- Click Review and publish.
- Read the checklist. Green items are fine, orange items are warnings, red items must be fixed. Click Fix next to an item to jump to the right tab.
- Click Publish.
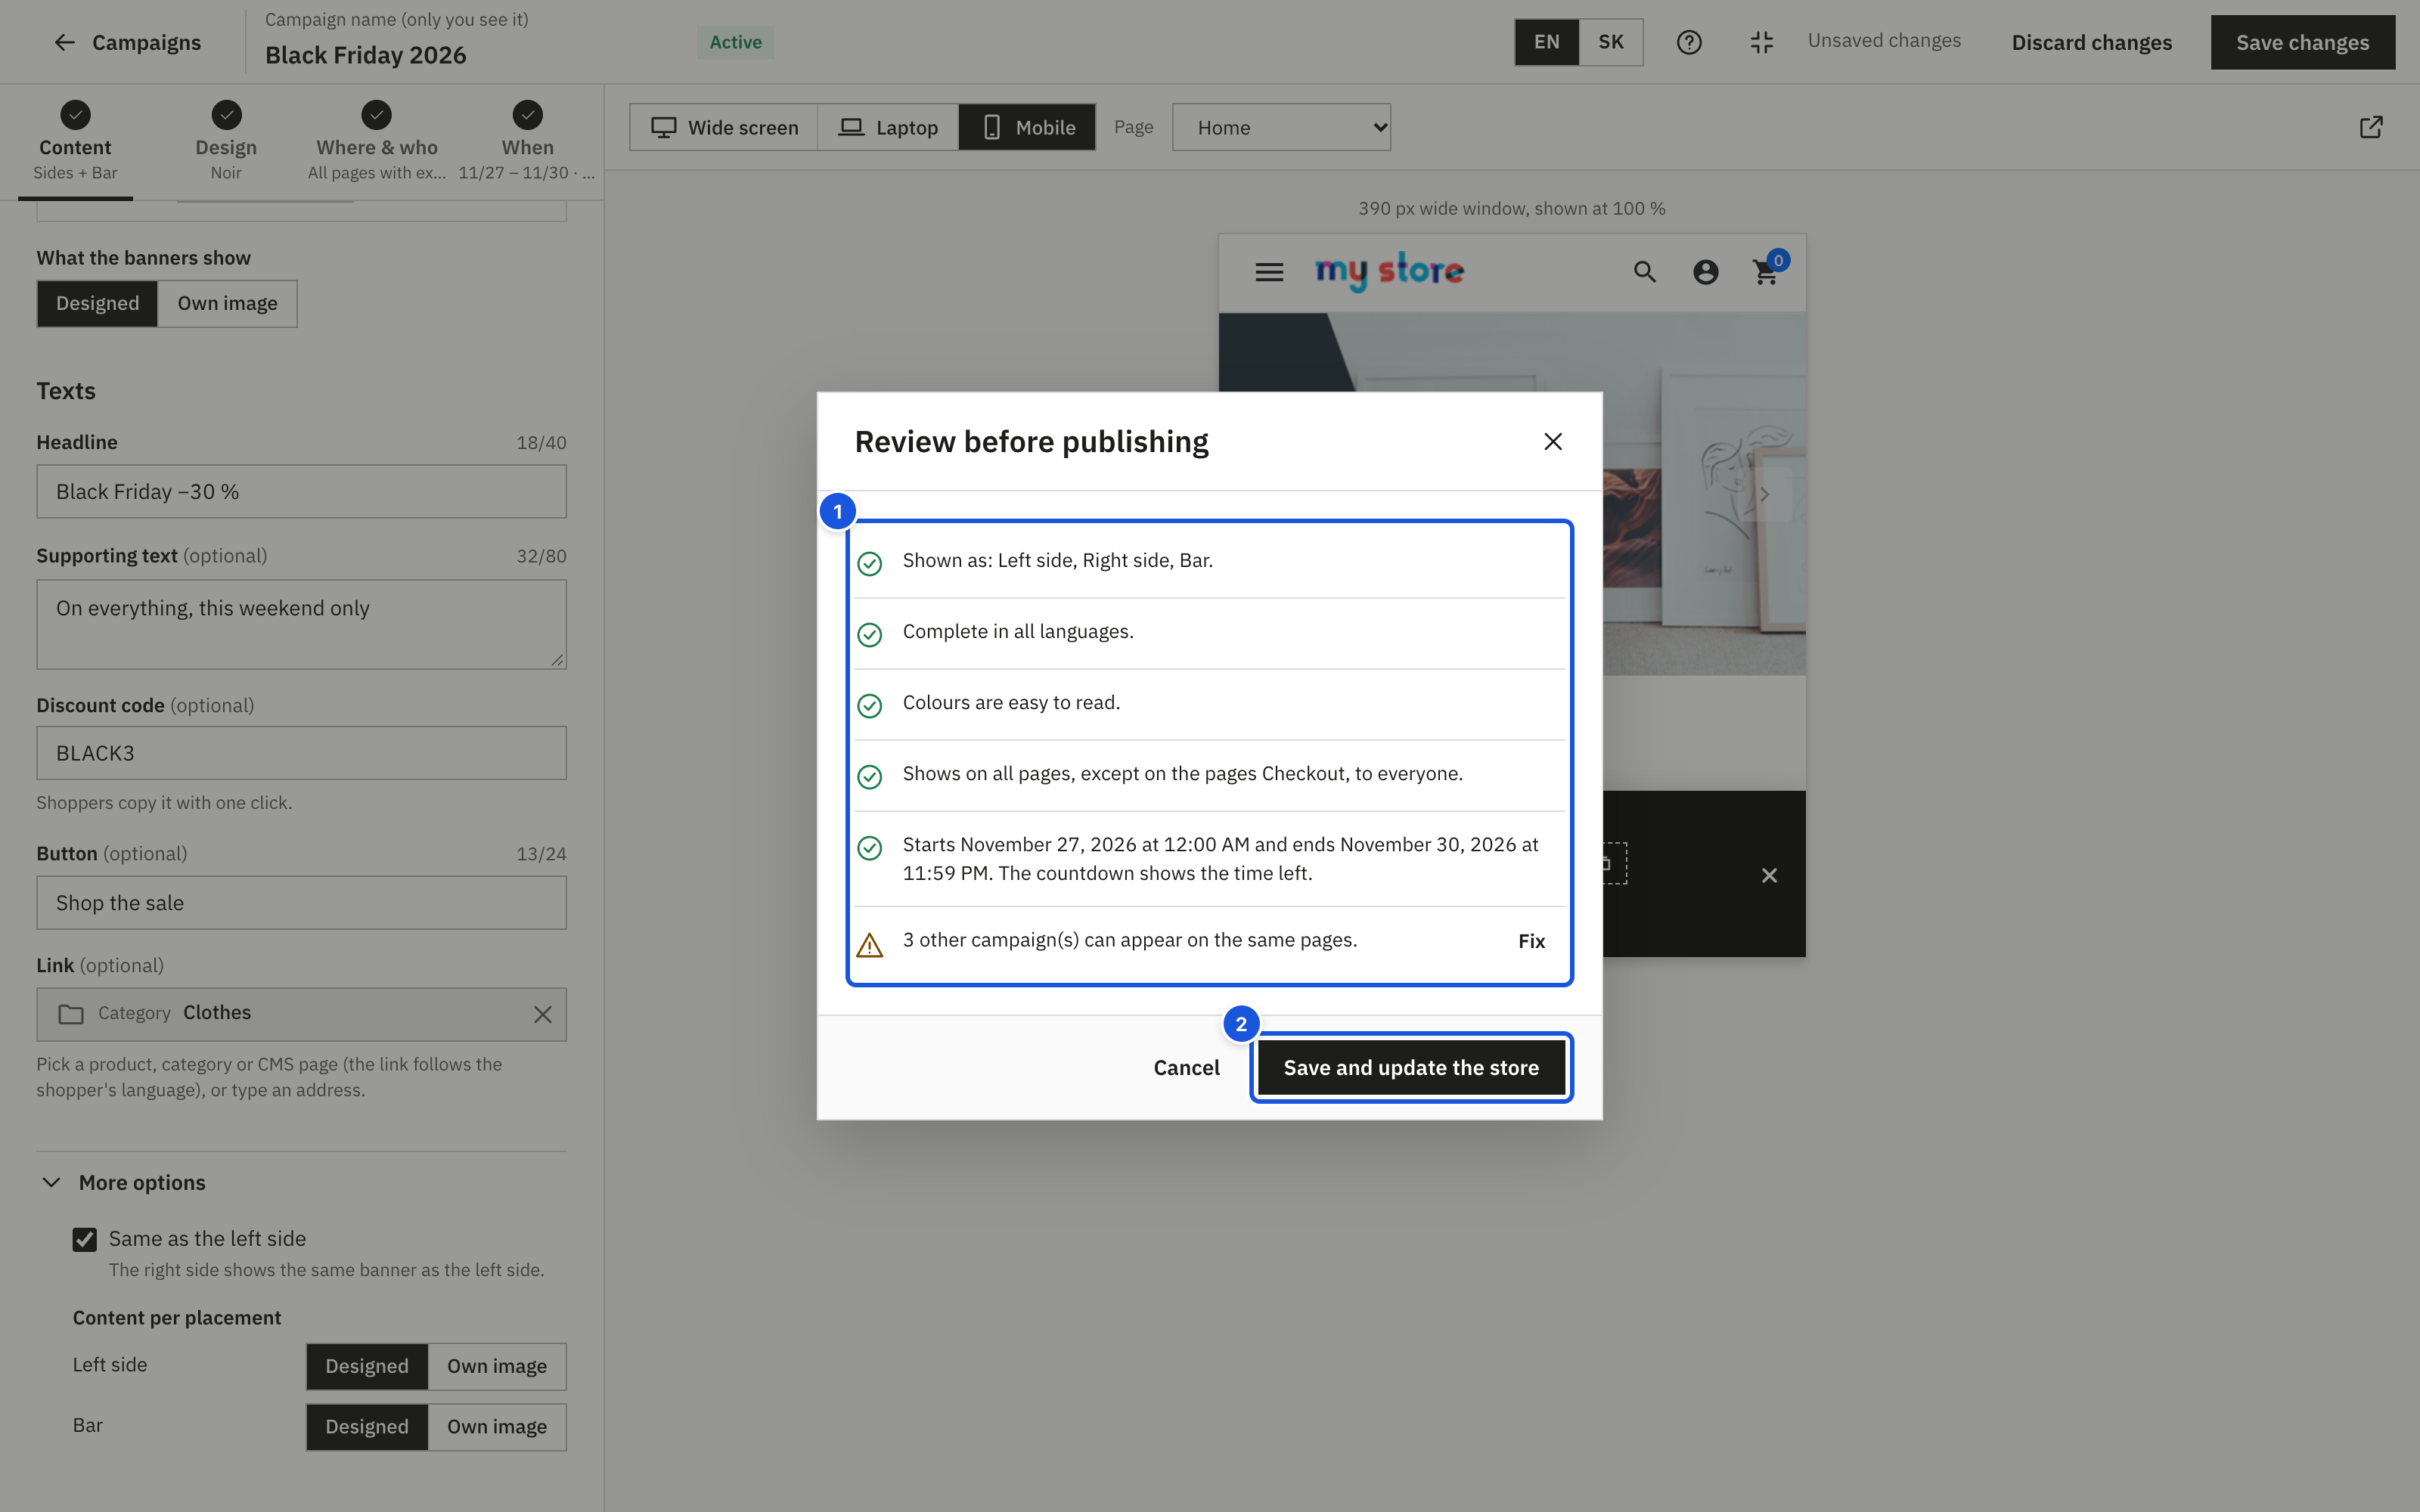
- What the checks found: green is fine, orange is a warning, red must be fixed
- Publish (for a campaign that is already live: Save and update the store)
Your campaign is live. Open your store in a new browser window to see it. The campaign list now shows it as Active (or Scheduled if its start date is in the future).
Not ready yet?
Click Save draft instead. A draft never appears in the store; you can finish it later from the campaign list.
Next steps
- Learn every option of the editor.
- Upload your own banner images: Content > Images.
- Adjust the width and position of the banners for your theme: Display settings.